
Installing a new dishwasher in your Edmonton home seems straightforward, but a successful setup begins long before you touch a single tool. It starts with a solid pre-installation plan: careful measurements, a clear understanding of your plumbing and electrical systems, and gathering the right gear. Getting this prep phase right is the single best way to ensure your installation is smooth, safe, and leak-free.
This guide will walk you through everything, from planning and budgeting to the final checks, so you can tackle the job with confidence or know when to call a pro.
Your Pre-Installation Game Plan
Think of this as creating a blueprint for a successful project. A few minutes of planning now can save you hours of frustration and multiple unplanned trips to the hardware store. It's the difference between a seamless DIY job and a weekend-long headache.
Measure Twice, Install Once
First, grab your tape measure. A dishwasher that doesn’t fit is a surprisingly common and completely avoidable problem.
-
Cabinet Opening: Measure the exact height, width, and depth of the space where the dishwasher will go. Write these numbers down. Most standard dishwashers are 24 inches wide, but you must measure your specific opening to be certain.
-
Door Clearance: Open nearby cabinet doors and drawers. Measure from the front face of your cabinets to anything opposite, like a kitchen island. You need to ensure the new dishwasher door can open fully without hitting anything.
This simple step prevents the sinking feeling of realizing your new appliance is a centimetre too wide or its door smacks into the island every time you open it.
Audit Your Connections
Next, inspect your existing plumbing and electrical hookups. This is where many DIY projects hit a snag, especially in some of Edmonton's older homes.
Look under your sink for three key connections:
-
Hot Water Supply: You should see a flexible, braided steel line connected to a small shut-off valve on your hot water pipe. Gently turn the valve to ensure it moves freely and isn't seized or leaking.
-
Drain Line: This is typically a flexible hose running from your current dishwasher to a small nipple on your garburator or the sink's drain plumbing.
-
Electrical Source: You should find a dedicated electrical outlet under the sink or in an adjacent cabinet. In some cases, it might be hardwired directly. Verifying you have the correct, code-compliant power source is a crucial safety check.
Expert Insight: A common mistake is assuming old connections will work with a new dishwasher. Always check the new model's manufacturer specifications against your current setup to avoid compatibility issues.
Gather Your Tools and Supplies
Having everything you need within arm's reach makes the installation process much smoother. A dishwasher installation kit is a smart purchase, as it conveniently bundles a new, high-quality water line and all necessary fittings.
Here’s a quick breakdown to help you get organized.
Pre-Installation Checklist: Tools vs. Supplies
| Item Category | Essential Tools | Required Supplies |
|---|---|---|
| Plumbing | Adjustable Wrenches, Pliers, Bucket & Towels | Dishwasher Installation Kit, PTFE Tape |
| Levelling | Level, Tape Measure | Shims (if needed) |
| Electrical | Screwdrivers (various types), Voltage Tester | Wire Nuts (if hardwiring) |
| General | Drill with various bits, Utility Knife | Safety Gloves, Safety Glasses |
Taking the time to sort this out means you won't have to stop once the hands-on work begins. Nailing this pre-installation plan is the true foundation of a successful dishwasher installation in Edmonton and sets you up for a job done right the first time.
Understanding Dishwasher Installation Costs in Edmonton
Let's get straight to the point: what will it really cost to get a new dishwasher installed in your Edmonton home? The final price isn't a single number; it’s a combination of a base labour fee plus any additional costs depending on your specific setup. Knowing these factors upfront helps you set a realistic budget and avoid surprises.
The simplest job is a direct replacement—removing an old dishwasher and installing a new one in the same spot with modern, ready-to-use hookups. In this case, you're primarily paying for a technician's time and expertise.
However, as many homeowners in older Edmonton neighbourhoods know, installations aren't always that straightforward. That's when costs can begin to add up.
Key Factors That Influence Your Final Cost
Several common issues can increase the base price of an installation. A good technician will identify these during a quote, but it’s helpful for you to know what to look for. Professionals often use tools like plumbing estimating software to provide a precise breakdown of labour and material costs, ensuring an accurate quote.
The condition of your plumbing is a major cost driver. If you lack a dedicated shut-off valve for the hot water line or if existing pipes are old and corroded, a plumber will need to make updates. This is essential for connecting your new appliance safely and ensuring everything meets current building codes.
Your home's electrical setup is another critical factor. Modern dishwashers have specific power requirements. If your kitchen wiring isn’t up to code—perhaps it's missing a dedicated circuit or a proper outlet—an electrician will need to run new wiring from your breaker panel. This isn't just a recommendation; it's a vital safety measure.
Breaking Down the Numbers in Edmonton
So, what should you expect to see on an actual quote? Here in Edmonton, a typical professional dishwasher installation ranges from CA$150 to CA$300 for a standard replacement. This baseline figure covers the labour for a direct swap.
This price assumes your plumbing and electrical systems are already compliant and in good condition. If any extra work is needed, the costs will increase.
-
Plumbing Modifications: Installing a new shut-off valve or replacing old pipes could add CA$100 to CA$300 or more, depending on the complexity.
-
Electrical Work: Installing a new, dedicated outlet is a more involved job that can add CA$150 to CA$500 to cover the extra labour and materials.
-
Cabinetry Adjustments: If the new dishwasher doesn't fit perfectly, minor tweaks to the surrounding cabinetry may be needed, costing an extra CA$100 to CA$250.
-
Old Appliance Disposal: Most services will haul away your old unit, typically for a fee between CA$50 to CA$100.
Keep in mind that a "first-time" installation—placing a dishwasher where one has never existed—is the most complex scenario. It requires creating new plumbing, drainage, and electrical lines, placing it at the higher end of the cost spectrum. For a deeper dive into budgeting, explore our guides on appliance costs.
By understanding these potential add-ons, you can have a more informed conversation with any installation professional in Edmonton and ensure you receive a fair, transparent price.
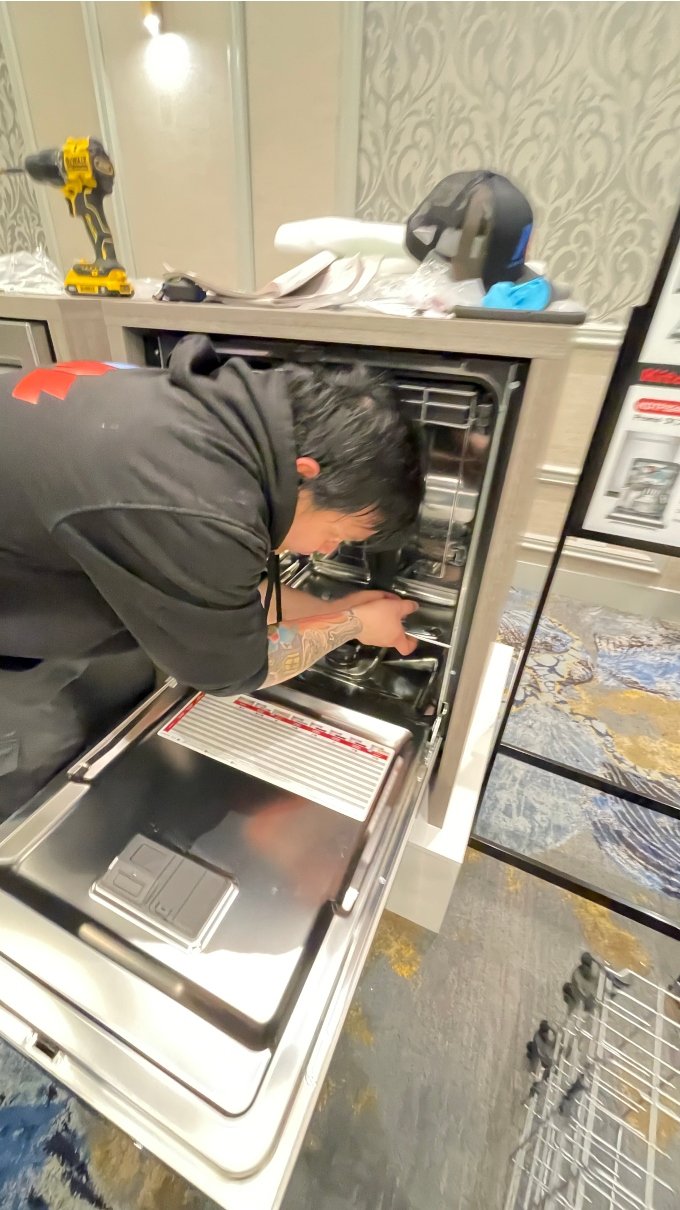
The Dishwasher Installation Process From Start to Finish
You've planned and budgeted. Now it's time for the hands-on work. For a proper dishwasher installation Edmonton homeowners can rely on, a methodical approach focusing on precision and safety is essential. This ensures every connection is secure and the unit is set for years of dependable use.
Let's walk through the process step-by-step to help you avoid common pitfalls that lead to leaks, poor performance, or safety hazards.
Safety First: Disconnecting the Old Unit
Before touching your old dishwasher, you must cut the power and water. This is the most critical safety step to prevent electrical shock and a flooded kitchen.
-
Shut Off the Power: Go to your home's electrical panel. Find the breaker for the dishwasher and flip it to the "OFF" position. If your breakers aren't clearly labelled, turn off the main breaker to be safe.
-
Turn Off the Water: Look under your kitchen sink for the hot water line connected to the dishwasher. Find the small shut-off valve on this line and turn it clockwise until it's fully closed.
With the power and water off, place a shallow pan and some old towels under the sink and in front of the dishwasher. Some water will inevitably spill from the hoses when you disconnect them, and this will catch the mess.
Now you can disconnect the three lines: the drain hose, the water supply line, and the electrical wiring. Take your time. An adjustable wrench is needed for the water line, the drain hose is usually held by a simple clamp, and the electrical wires are typically inside a small junction box at the bottom front of the unit.
Preparing and Connecting the New Dishwasher
Once the old unit is out of the way, you can prep the new one. Most models come with the drain hose attached, but you'll need to connect the new hot water supply line and electrical cord.
It's much easier to access the connections by laying the new dishwasher on its back (on cardboard to prevent scratches). This is the ideal time to attach the 90-degree elbow fitting to the dishwasher's water inlet valve. Remember to wrap the threads with PTFE tape (Teflon tape) before screwing it on to create a watertight seal.
Expert Tip: Avoid over-tightening the water line fittings. A common error is applying too much force, which can crack the plastic inlet valve and cause a slow, hidden leak. The connection should be snug but not forced.
After making the water and electrical connections according to the manufacturer's manual, gently slide the new dishwasher into the cabinet opening. Be very careful not to pinch or kink the drain hose or water line. A kinked hose is a leading cause of drainage failure in new installations.
This flowchart illustrates how installation costs in Edmonton are typically structured.
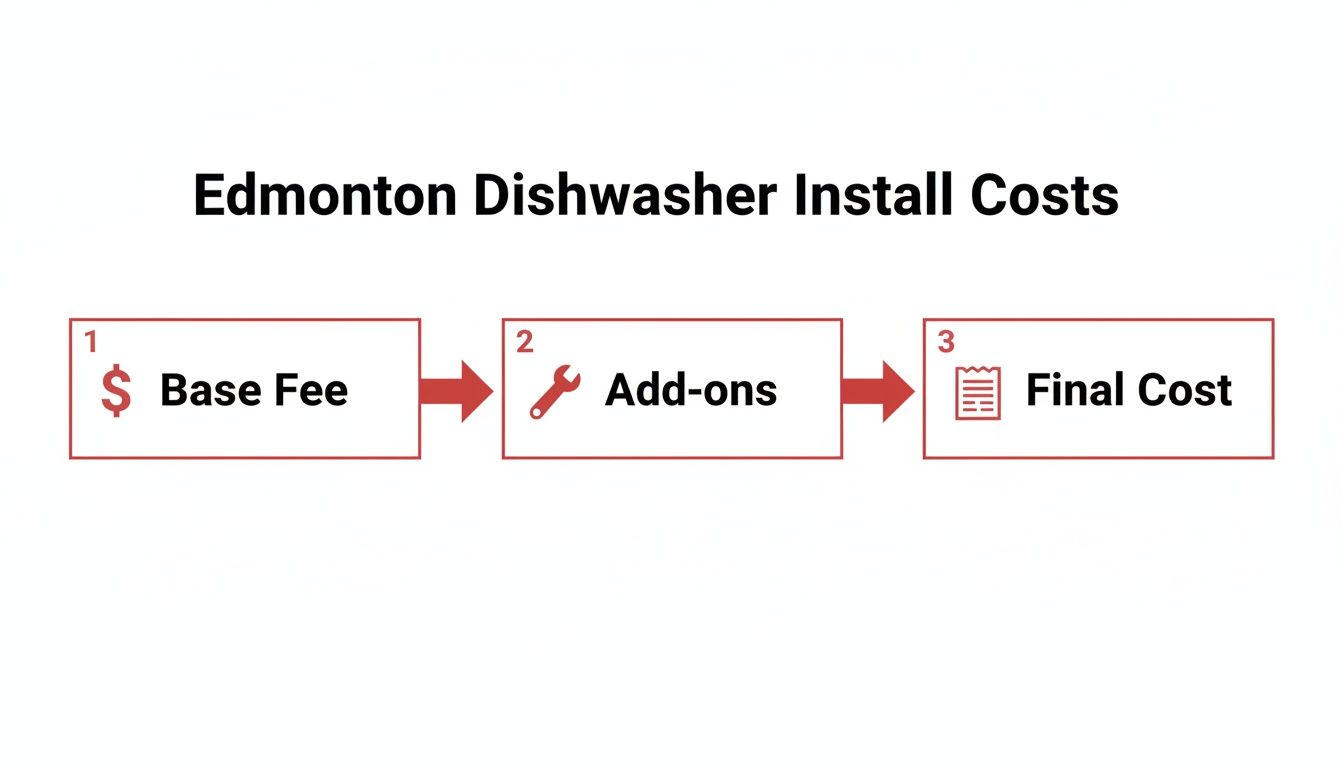
As you can see, the final bill often includes more than just a base fee; necessary add-ons and parts play a significant role in the total.
The Final Steps: Levelling and Securing
Levelling the dishwasher is a step people often rush, but it’s critical for quiet and effective operation. An unlevel unit can cause the door to leak, racks to roll out, and the machine to vibrate loudly.
Use a level to check the appliance from front-to-back and side-to-side. Most dishwashers have adjustable front legs that you can turn with a wrench. Some also have rear levelling legs adjustable from the front with a long screwdriver.
Once it's perfectly level, anchor it to the countertop. This prevents the machine from tipping forward when you pull out a heavy, dish-filled rack.
-
Anchoring Method: Your new dishwasher includes small metal mounting brackets. These attach to the top of the dishwasher's frame and screw into the underside of your countertop.
-
For Stone Countertops: If you have granite or quartz, you cannot screw directly into it. Instead, use the alternate side-mounting holes to secure the dishwasher to the cabinets on either side.
After securing the unit, reattach the decorative toe-kick panel at the bottom. While the process can feel complex, taking your time pays off. If you'd rather have an expert handle it, searching for a professional dishwasher installation near me ensures peace of mind and a job done right.
DIY Installation vs Hiring an Edmonton Professional
You have your new dishwasher, and now you face a decision: install it yourself or call a professional? There's no single right answer. The best choice depends on your comfort level with home repairs, your kitchen's specific setup, and your tolerance for risk.
The DIY route can be empowering. The most obvious benefit is saving money on labour costs. Beyond that, there's a real sense of accomplishment in successfully completing a project yourself.
However, it's not without its pitfalls. A small mistake, like an improperly tightened water line, can cause a slow leak that leads to significant damage to your floors and cabinets. An error in the electrical wiring is not just a functional issue—it's a major safety hazard. You could also inadvertently void your new appliance's warranty if the manufacturer determines it was installed incorrectly.
The Case for a Professional Technician
Hiring a professional for your dishwasher installation in Edmonton is an investment in peace of mind. A certified technician brings not only tools but also years of hands-on experience and a thorough understanding of local plumbing and electrical codes. They ensure your installation is functional, safe, and compliant.
When an unexpected problem arises—like old, corroded pipes or a misaligned cabinet opening—a pro can solve it in minutes, saving you hours of frustration.
The single greatest benefit of hiring a professional is the guarantee. If anything goes wrong due to the installation, they will return to fix it at their own expense. This protects your investment in both your new dishwasher and your home.
Making the Right Call for Your Situation
To help you decide, here's a quick comparison tailored for Edmonton homeowners.
DIY vs Professional Installation Decision Matrix
| Consideration | DIY Installation | Professional Installation |
|---|---|---|
| Cost | Lower upfront cost. You only pay for the dishwasher and any necessary parts or tools. | Higher upfront cost. You're paying for labour, expertise, and a guarantee on the work. |
| Time & Effort | Can be time-consuming. Plan for several hours, plus potential trips to the hardware store. | Fast and efficient. Most installations are completed in 1-2 hours. |
| Risk of Damage | Higher. Small errors with water lines or electrical connections can lead to major damage. | Very low. Technicians are insured, and their work is guaranteed against installation-related faults. |
| Skill Level Required | Basic plumbing and electrical knowledge. You should be comfortable shutting off water/power. | None. The technician handles everything from start to finish. |
| Warranty | Risk of voiding. An improper installation can void your appliance's manufacturer warranty. | Warranty protected. Professional installation ensures your warranty remains valid. |
| Peace of Mind | Variable. Depends on your confidence and the smoothness of the installation process. | High. You know the job is done correctly, safely, and is backed by a professional guarantee. |
So, when does each path make sense?
-
When DIY Makes Sense: If you are simply replacing an old dishwasher with a new one of the exact same size, and you have modern, easily accessible plumbing and electrical connections, this is a very doable project. If you have experience with basic home repairs and own the right tools, you can likely handle it.
-
When to Call a Pro: You should always hire a professional for a new installation where no dishwasher existed before. The same applies if your home has older wiring and plumbing, or if cabinet modifications are needed. For high-end or complex appliances, an expert is a must; learn more in our article on choosing a professional over DIY for high-end appliances.
Ultimately, weigh the potential cost savings of a DIY job against the safety, speed, and guaranteed workmanship of a professional. Understanding the factors influencing homeowner hiring decisions can also provide valuable perspective.
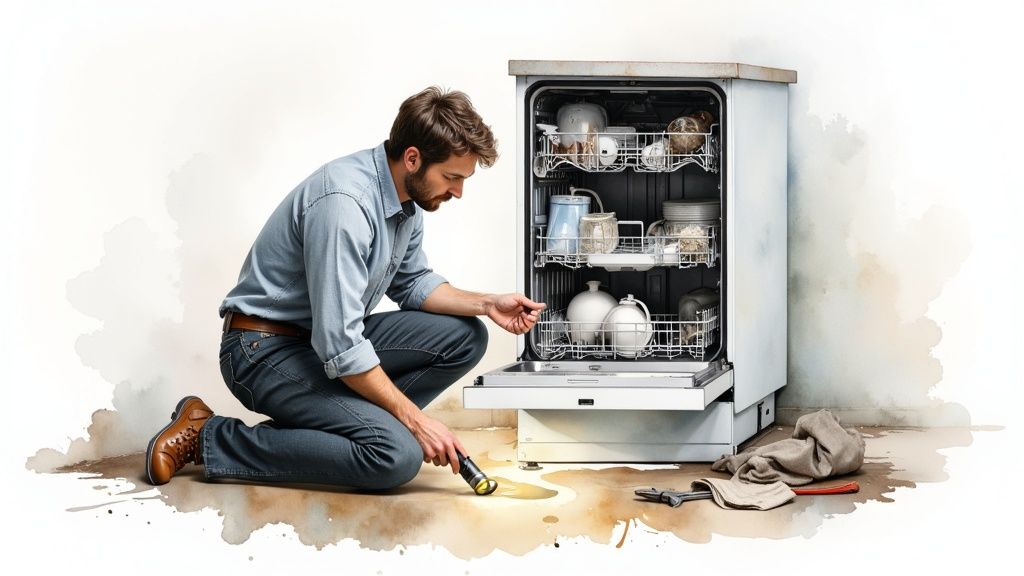
Troubleshooting Common Installation Problems
Even the most careful installation can encounter issues. Seeing a puddle of water or having the unit refuse to power on is frustrating, but don't panic. Most problems that appear right after a dishwasher installation in Edmonton are common and often have simple solutions.
Here's how to solve the most frequent issues, from leaks and power failures to drainage problems.
Leaks: The Most Common Culprit
A puddle under your newly installed dishwasher is alarming, but the good news is that 90% of the time, the leak is from a connection that just needs to be tightened, not from a faulty appliance.
First, shut off the power at the breaker and turn off the water supply valve. Now, use a flashlight to identify the source of the water.
-
Water Inlet Hose: This is the most likely suspect. Check where the hot water line connects to the dishwasher's inlet valve. The fitting should be snug, but remember not to overtighten and crack the plastic valve.
-
Drain Hose: Ensure the clamp holding the drain hose to your sink's drain or garburator is tight. Inspect the hose itself for any cracks or punctures.
Pro Tip: To find a slow drip, slide a dry paper towel under the dishwasher's connections after the first cycle. Check it after an hour; any damp spots will reveal the exact location of your leak.
Why Won’t My New Dishwasher Turn On?
You've done all the work, you're ready to run the first load, and… nothing happens. This is almost always a simple electrical issue, not a sign of a defective appliance.
Start with the easiest checks:
-
Check the Breaker: Go to your electrical panel. Is the dishwasher's breaker firmly in the "ON" position? It can sometimes trip during installation.
-
Verify the Connection: If your unit is hardwired, use a voltage tester to confirm power is reaching the junction box. A loose wire nut is a common error, so double-check that all connections are secure.
-
Check the Outlet: If your dishwasher plugs in, ensure the plug is pushed in all the way. These outlets are often controlled by a wall switch, so make sure it's turned on.
The Dishwasher Isn't Draining Properly
A pool of murky water at the bottom of the dishwasher after a cycle indicates a drainage problem. Fortunately, the fix is usually straightforward.
A kinked drain hose is the number one cause. The flexible hose can easily get pinched behind the unit, blocking water flow. Gently pull the dishwasher out a few inches to ensure the hose has a smooth, clear path.
Another common oversight, especially with a new garburator, is the knockout plug. Garburators ship with a small plastic plug inside the dishwasher drain nipple. If this plug isn't removed with a hammer and screwdriver before attaching the hose, the water has nowhere to go.
Poor Cleaning Performance From a New Unit
It's a major letdown when a new machine leaves dishes dirty. If you're wondering why your dishwasher is not getting water, our detailed guide offers several causes and fixes for insufficient water supply.
However, the most common reason for poor cleaning right after installation is that the dishwasher isn't level. If the unit tilts forward, water pools at the front and can't reach the spray arms effectively. Use a level to check it front-to-back and side-to-side, adjusting the feet until it's perfectly balanced.
Finishing Touches and Professional Support
Your new dishwasher is installed and looks great, but a few final steps separate a good installation from a great one. These checks protect your home and ensure your appliance works perfectly.
Before loading any dishes, run one full, empty cycle. Stay nearby and listen for any unusual rattles or humming. Most importantly, use a flashlight to inspect the water inlet and drain hose connections for even the smallest drop of water. Catching a tiny drip now can prevent a major water damage disaster later. This test run is a non-negotiable final check for any dishwasher installation in Edmonton.
Finalizing Your Installation
Once the test cycle completes without leaks or strange noises, two quick tasks remain:
-
Register Your Warranty: Go online and register your new dishwasher with the manufacturer. This activates your warranty, which is your safety net if anything goes wrong with the appliance.
-
Keep Your Paperwork: Store the user manual, receipt, and warranty information in a safe place. You'll be glad you have them if you ever need service.
Sometimes, despite your best efforts, something isn't right. If you're facing a persistent leak or an electrical issue that makes you uneasy, it’s time to call a professional. Knowing your options for same-day appliance repair can be a lifesaver for urgent problems.
Your Dishwasher Installation Questions Answered
We get many questions from Edmonton homeowners about what to expect when installing a new dishwasher. Here are answers to the most common ones.
How Long Does a Typical Installation Take?
For a straightforward replacement where existing plumbing and electrical hookups are in good shape, a professional technician can usually complete the job in one to two hours.
However, installing a dishwasher where one has never been before is more complex. Running new water lines, a drain, and a dedicated electrical circuit can take half a day or more.
Do I Really Need to Buy a Dishwasher Installation Kit?
Yes, we always recommend it. Even if your old water line looks fine, it's not worth the risk. A new installation kit includes a durable, braided steel water supply hose and the proper brass fittings to ensure a secure, leak-proof connection.
Our Advice: Always spend the extra money on a new kit. Reusing an old supply line is a leading cause of slow leaks that can cause serious water damage to your kitchen floors and cabinets before you even notice them.
Can a Dishwasher Be Installed Where There Wasn’t One Before?
Absolutely! While it's a more involved project, it's very common. A professional will need to tap into your hot water supply, run a new drain line to your sink's plumbing, and install a dedicated electrical circuit. This often requires work behind walls and under the floor, so it's a job best left to an experienced professional.
Need appliance repair? Visit RepairMyAppliance.ca or call 587-416-5888 for fast, professional service.