Ever wonder how your oven magically holds a perfect 350°F? It’s not magic—it's a small, clever component called the temperature sensor. This little part acts as your oven's personal thermostat, constantly checking the heat and telling the main control board when to power up the heating elements. Understanding how it works is the key to solving common oven problems like uneven baking or incorrect temperatures.
The Hidden Thermostat Inside Your Oven
Think of the temperature sensor as the unsung hero of your kitchen. It’s a slim metal probe, usually around six inches long, tucked away inside the oven cavity—typically near the top back corner. Its only job is to provide real-time temperature updates to the oven's electronic brain, the control board.
This constant back-and-forth communication is what allows your oven to hit and maintain the exact temperature you set. Without it, the oven would either heat up uncontrollably or not get hot enough, leaving you with burnt roasts or undercooked cakes.
Why This Small Part Is So Important
The sensor's role is absolutely critical for consistent cooking and baking. An accurate sensor ensures your oven preheats correctly and holds a steady temperature from start to finish. This stability is the secret to a perfectly risen loaf of bread, a juicy roast chicken, and cookies that are evenly browned every time.
When this little component starts to fail, it's often the root cause of many frustrating oven problems. Let's break down what the sensor actually does for your oven and, more importantly, for your meals.
Oven Sensor Key Functions at a Glance
| Function | What It Does | Why It Matters for Your Cooking |
|---|---|---|
| Temperature Monitoring | Continuously measures the air temperature inside the oven. | Prevents hotspots and cold spots, ensuring food cooks evenly. |
| Data Communication | Sends electrical signals with temperature data to the control board. | Allows the oven to react instantly to temperature drops when you open the door. |
| Heating Regulation | Tells the control board when to turn heating elements on or off. | Maintains the precise temperature needed for delicate recipes like soufflés or cheesecakes. |
Simply put, a healthy sensor means you can trust your oven to do its job.
A properly functioning sensor is the difference between predictable, delicious results and culinary guesswork. It's the core component responsible for your oven’s accuracy and reliability.
Understanding its function is the first step toward figuring out what's wrong with your oven. If you suspect problems, professional stove and oven repair can quickly confirm if a faulty sensor is the culprit, restoring your appliance's performance and your confidence in the kitchen.
The Science of Sensing Heat

So, how does that simple metal probe actually know the temperature inside your oven with such accuracy? It all comes down to some surprisingly straightforward electrical science. Most modern oven sensors are a special kind of resistor called a thermistor—a simple mashup of the words "thermal" and "resistor."
The principle behind it is beautifully simple: as the temperature inside the oven climbs, the sensor’s electrical resistance goes up in a predictable, consistent way. You can think of it like a valve that gets progressively harder to turn the hotter it gets.
Your oven’s main control board sends a very small, safe electrical current through the sensor. By measuring exactly how much that current is being resisted, the board can instantly translate the electrical reading into an accurate temperature.
Built to Last: The Material That Makes It Work
This little sensor has a tough job. It needs to withstand wild temperature swings for years on end, going from room temperature all the way up to over 500°F during a self-clean cycle, without ever losing its accuracy.
That’s why many high-quality sensors use platinum for the internal resistive element. Platinum is incredibly stable at high temperatures, and its resistance changes in a very linear, predictable fashion. This consistency is what allows your oven to hold a perfect 375°F for your cookies, bake after bake.
At its core, an oven sensor works because of the direct relationship between heat and electrical resistance. As the temperature rises, so does the resistance, giving your oven’s brain a clear signal to turn the heat on or off.
This clever feedback loop is what ensures your oven doesn’t just get “hot,” but gets precisely as hot as you tell it to.
Translating Resistance Into Temperature
The oven’s control board isn’t just guessing; it’s reading a specific resistance value, measured in ohms. It then compares this number to a built-in chart that matches every resistance value to a precise temperature.
Here’s how that plays out in real-time:
- Low Resistance: When your oven is cold (around 1100 ohms at room temperature), the low resistance tells the control board to turn on the bake and broil elements.
- Target Resistance: As the oven heats up, the resistance climbs. Once it hits the value that matches your set temperature (say, 350°F), the control board cuts the power to the heating elements.
- Constant Adjustments: The moment the temperature dips, the resistance drops with it, and the control board kicks the elements back on. This constant on-and-off cycling is what keeps the temperature so stable.
This elegant system is the secret behind your oven's reliable performance and the key to getting consistent results with your cooking. It’s a simple concept, but one that has its roots in early 20th-century tech. Much like learning how an air conditioner works helps you understand your home's cooling, knowing how this sensor operates demystifies your oven's heating.
Recognizing the Signs of a Failing Sensor
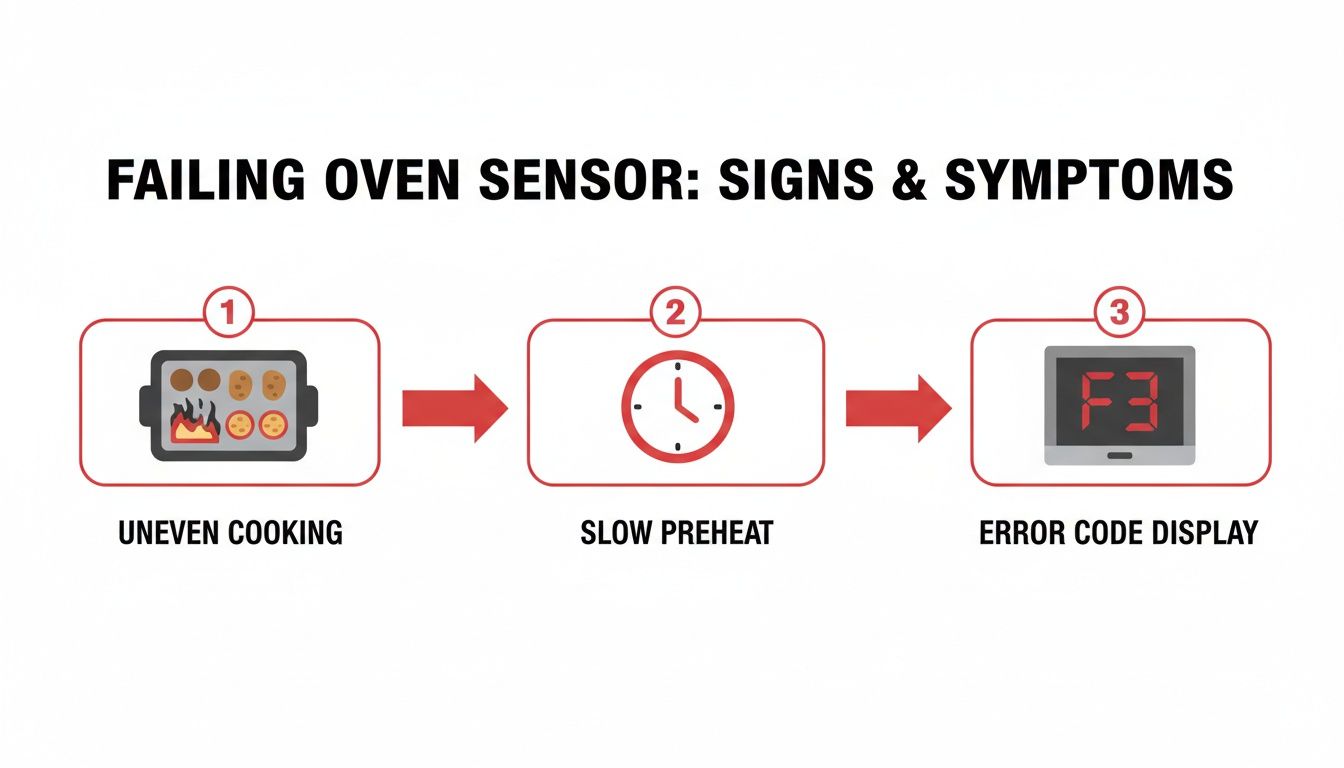
When your oven's temperature sensor starts to go, your baking is usually the first thing to suffer. One day, your trusted appliance works perfectly; the next, it’s the source of major kitchen headaches. These cooking problems aren't random—they're clear signals that a key component is failing. Learning to spot these signs is the first step toward a successful repair.
One of the most common giveaways is unevenly cooked food. You might pull out a sheet of cookies where half are burnt black and the others are still pale and doughy. Or maybe your favourite casserole recipe comes out scorched on top but still cold in the middle. This happens because a faulty sensor is sending bad information to the oven's control board, causing the heating elements to turn on and off at the wrong times.
Another telltale sign is a dramatic change in your usual cooking times. If recipes that you’ve perfected suddenly take much longer to cook, the sensor is likely telling the oven it's hotter than it actually is. On the flip side, if your food is consistently burning before the timer even dings, the sensor is probably causing the oven to run way too hot.
Inconsistent Preheat Times and Error Codes
Start paying attention to how long your oven takes to preheat. An oven that seems to take forever to reach the right temperature—or never quite gets there—could be dealing with a bad sensor. The main control board depends on the sensor to know when preheating is done, and if that data is wrong, the preheat cycle can drag on and on.
Sometimes, your oven will just tell you what's wrong by flashing an error code on its display. These codes are the appliance's built-in diagnostic system.
- Common Fault Codes: Error codes like F3 or F4 on many models point directly to an issue with the temperature sensor or its wiring.
- Consult Your Manual: While those codes are common, they can vary between brands. Your best bet is to check your oven's manual to see what a specific code means for your model.
- Specific Brand Issues: Some manufacturers use unique codes for sensor failures. For example, if you own a Thermador appliance, an error like the Thermador oven F34 error code gives you a very specific clue about what needs to be fixed.
A faulty oven sensor doesn't just ruin dinner—it wastes energy and makes your appliance unreliable. Spotting these early warning signs is the best way to get ahead of the problem.
Troubleshooting Oven Temperature Problems
It can be tough to figure out if the sensor is the real problem or if another part is to blame. Sometimes, the symptoms of a bad sensor can look a lot like a failing heating element or control board. This quick table can help you narrow down the possibilities.
| Symptom You Notice | Likely Caused by a Bad Sensor If… | Could Be Another Problem Like… |
|---|---|---|
| Food Burns or Is Undercooked | The problem is consistent whether you're baking, roasting, or broiling. | A failing heating element (the bake or broil element is out). |
| Oven Won't Heat at All | You see a sensor-related error code on the display. | A faulty igniter (on a gas oven) or a dead control board. |
| Temperature Seems Wildly Off | The oven either gets scorching hot or stays lukewarm on any setting. | The oven's main control board needs to be recalibrated or replaced. |
Using this guide, you can start to connect what's happening in your oven with the most likely cause. If the signs still point to the sensor, the next step is to test it.
How to Test an Oven Temperature Sensor
So, you’re getting unevenly baked cookies and mysterious error codes? If all signs are pointing to a bad oven sensor, you don't have to just guess. With a simple tool called a multimeter, you can run a quick test to find out for sure. It’s a straightforward process that lets you get to the root of the problem yourself, but let's be clear: safety comes first.
Before you even think about touching a single screw, you absolutely must disconnect your oven from its power source. For an electric oven, that means pulling it out from the wall and unplugging that heavy-duty cord. If you have a gas oven, you need to shut off the gas supply valve and unplug its electrical cord. Seriously, never skip this step.
The symptoms below are usually what lead homeowners to suspect the sensor in the first place.
Think of these signs—from burnt bottoms on your pizza to cryptic codes on the display—as your oven’s way of telling you its internal thermometer is on the fritz.
Step-by-Step Guide to Testing
Once you are 100% sure the oven is completely powered down, you can get started. You'll need a multimeter, a screwdriver, and maybe a small socket wrench.
-
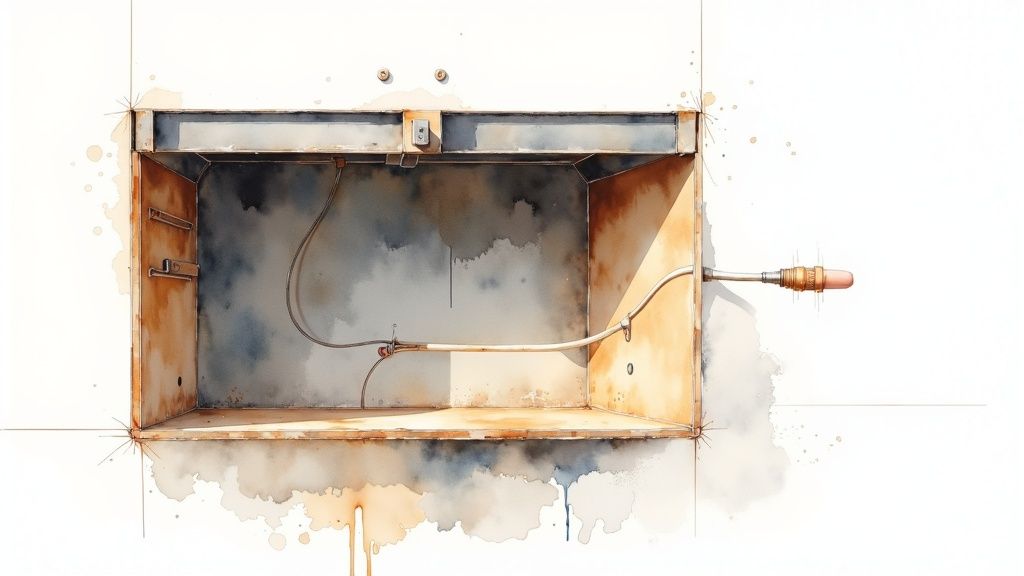
Find the Sensor: Open the oven door and peek inside. The sensor is that thin, pencil-like metal probe, usually sticking out from the back wall near a top corner. It's normally held in place with just one or two small screws.
-
Gently Remove It: Use your screwdriver to take out the screws holding the sensor. Carefully pull the sensor forward into the oven cavity just enough to reveal the wire connector at the back. There's a little tab on the plastic connector—press it to unplug the sensor.
-
Set Up Your Multimeter: Grab your multimeter and turn the dial to the ohms setting. It’s marked with the Greek omega symbol (Ω). A setting of 2k ohms is usually perfect for this job.
-
Measure the Resistance: Take the two metal probes from your multimeter and touch them to the two metal prongs on the sensor's connector. It doesn’t matter which probe touches which prong.
-
Check the Reading: Look at the multimeter's screen. It will show you a number, which is the sensor's electrical resistance in ohms.
Making Sense of the Results
So, what does that number actually mean? Oven sensors are designed to have a very specific resistance reading at room temperature. For most modern ovens, a healthy sensor should measure somewhere between 1080 and 1100 ohms at about 21°C (70°F).
If your reading falls neatly within that range, your sensor is probably doing its job correctly. But if the number is way off—or if the meter reads "OL" (which means over limit) or shows nothing at all—then the sensor has failed. It's time for a replacement.
If the test confirms you've got a bad sensor, you know exactly what to do next. While some handy homeowners are comfortable swapping the part out themselves, any hesitation is a good reason to call in a professional. A mistake during installation could fry the oven's main control board, and that’s a much more expensive headache.
If you need more help, our guide on how to fix an oven has more tips on common problems.
Next Steps: DIY Fix or Professional Repair?
Okay, you've done the testing, and it looks like your oven sensor is the culprit. Now you’re at a fork in the road: do you roll up your sleeves and replace it yourself, or is it time to call in a professional?
For many homeowners who are comfortable with basic tools, this is a very doable DIY project. The job usually involves just a couple of screws and a simple plug, often taking less than 30 minutes from start to finish. It’s a great way to save a few bucks and get a little hands-on experience.
But a DIY fix isn't for everyone. Before you start unscrewing things, be honest about your comfort level. Are you confident you can safely and completely disconnect the oven from its power source? Do you have the right tools, like a screwdriver or maybe a small socket wrench, handy?
Going it alone can definitely save you money on labour, but it's not without its risks. Ordering the wrong part is a surprisingly common headache. Worse, accidentally damaging the wiring or the main control board during the swap can turn a simple fix into a much bigger, more expensive problem.
The Case for Calling a Professional
While replacing a sensor might seem straightforward, there are some solid reasons to leave this one to a trained technician. A pro brings expertise and peace of mind that a DIY project just can't match.
- Correct Parts Guaranteed: A technician knows exactly which sensor your oven model needs and has access to genuine OEM (Original Equipment Manufacturer) parts. No guesswork, no returns.
- Safety First: An expert knows the ins and outs of your appliance and can handle the repair without any risk of electrical shock or damage to the oven's sensitive electronics.
- Warranty on Work: Professional repairs almost always come with a warranty covering both the part and the labour. If anything goes wrong down the road, you’re protected.
Ultimately, the choice comes down to weighing the potential cost savings against the risks. If you’re on the fence, our guide on choosing professional over DIY appliance repair offers a deeper look to help you decide.
Hiring a professional isn't just about getting the repair done—it's about getting it done right the first time. It’s an investment in guaranteed parts and workmanship that ensures your oven operates safely and efficiently for years to come.
Whether you're gearing up for a DIY project or reaching out for professional help, understanding the big picture of appliance care is always a good idea. For a broader perspective, this a comprehensive guide to commercial kitchen equipment maintenance has some great insights. Making an informed choice is the best way to keep your kitchen running smoothly and safely.
How Modern Ovens Got So Smart
That simple thermistor we talked about has come a long way, completely changing how an oven sensor works and paving the way for today's high-tech smart ovens. Modern sensors are much more than just thermometers; they’re the brains behind the incredible cooking consistency and efficiency we now take for granted.
These upgrades aren't just flashy features—they offer real benefits for home cooks. For example, some high-end sensors can now measure humidity, which is the secret to getting perfect results in steam ovens. Others use solid-state RF energy to cook food with pinpoint precision, eliminating those annoying hotspots.
The Impact of Advanced Sensors
These innovations allow modern ovens to automatically adjust cooking cycles based on the food inside, which means better energy efficiency and flawless meals. It's not just talk, either. Appliance research labs have found that these sensor-controlled ovens can slash energy use by up to 20% compared to older models.
This technology is constantly being refined, making ovens smarter and more economical every year. You can learn more about the fascinating evolution of oven sensor technology and energy efficiency and how it has shaped modern cooking. All this progress really drives home just how critical a healthy sensor is to your oven's performance.
Frequently Asked Questions About Oven Sensors
Even after getting the rundown on how an oven sensor works, you probably still have a few questions. Let's tackle some of the most common ones we hear from homeowners.
How much does it cost to replace an oven sensor?
The good news is the sensor itself is usually pretty affordable, typically running between $25 and $75. If you decide to call in a pro for the job, you can expect the total bill, including the part and labour, to land somewhere between $150 and $250. The final cost really just depends on your specific oven model and the local service rates.
Can a bad sensor stop an oven from heating altogether?
Yes, it absolutely can. If the sensor completely fails and doesn't send any signal—or sends a nonsensical reading—to the control board, the oven's safety features will often kick in. In short, the oven doesn't get the "all-clear" signal that it's safe to heat up, so the heating elements won't turn on at all.
Is the oven sensor the same thing as the heating element?
Nope, they're two completely different parts that have to work together.
- The Oven Sensor: Think of this as the oven's thermometer. It's the thin metal probe responsible for measuring the temperature inside.
- The Heating Element: These are the big, black coils you see at the top (for broiling) and bottom (for baking) of the oven. They're the parts that actually get hot and do the cooking.
If your oven isn't heating, the sensor is a possible culprit, but a broken heating element is just as likely. If you suspect the element is the problem, our guide on how to replace an oven heating element can walk you through it.
Key Takeaway: Here’s an easy way to remember it: the sensor is the "brain" that tells the heating element when to turn on and off. The element is the "muscle" that does the actual work of heating. For your oven to cook properly, both need to be in good shape.
Knowing these differences will make it much easier to figure out what's wrong and explain the problem if you end up needing a repair technician.
Need appliance repair? Visit RepairMyAppliance.ca or call 587-416-5888 for fast, professional service.