Cleaning your washing machine filter is a quick job, we’re talking maybe five minutes, that can save you from a world of laundry headaches. It’s a simple process: find the filter, drain any trapped water, unscrew it, and give it a good rinse. Doing this simple task prevents poor draining, musty odors, and even expensive pump repairs, making it a critical part of appliance maintenance.
Why Cleaning Your Filter Is More Than Just a Chore
Let’s be real—cleaning a washing machine filter sounds like another tedious task to add to your list. But what if I told you it’s the secret to dodging a hefty repair bill, getting fresher-smelling clothes, and making your washer last longer? It’s easily one of the most overlooked maintenance steps, yet it’s absolutely critical.
When that filter gets packed with lint, hair, forgotten pocket treasures, and general grime, it puts a massive strain on the drain pump. The pump is forced to work overtime just to push water out, which leads to burnout and, eventually, failure. This isn’t just a possibility; as appliance repair technicians, it’s a root cause of common washer problems we see every single day.
The Real-World Impact of a Clogged Filter
A blocked filter doesn’t just sit there quietly. It kicks off a domino effect of laundry frustrations. Suddenly, your high-efficiency machine takes forever to finish, or your clothes come out sopping wet, forcing you to run an extra spin cycle and waste energy.
Here’s what really happens when you neglect this small but mighty component:
- Persistent Musty Odors: Trapped, stagnant water filled with decomposing lint and soap scum creates a perfect breeding ground for mold and mildew. The result? A funky smell that clings to both your machine and your clothes.
- Poor Draining Performance: The most obvious red flag is a puddle of water left in the drum after a cycle. This is a clear sign the pump can’t force water through the clogged filter.
- Longer Wash Cycles: Modern washers are smart. Their sensors can detect when water isn’t draining correctly and will often repeat or extend cycles to compensate, driving up your water and electricity bills.
- Potential for Leaks: In severe cases, the backpressure’s from a completely blocked filter can force water to find another way out—usually all over your laundry room floor.
Neglecting your washing machine filter is like trying to run a marathon while breathing through a straw. Eventually, the system gets overworked and breaks down. A clean filter ensures your machine can breathe and perform at its peak.
Here’s a snapshot of the common laundry problems a clean filter solves.
Quick Guide to Filter Cleaning Benefits
| Common Problem | How Cleaning Helps |
|---|---|
| Musty Smells | Eliminates trapped, stagnant water and decomposing gunk that breeds mold and mildew. |
| Wet Clothes | Ensures the drain pump can efficiently remove all water at the end of the cycle. |
| Slow Draining | Removes the blockage, allowing water to flow out freely and quickly. |
| Longer Cycles | Prevents the machine’s sensors from unnecessarily extending cycles due to poor drainage. |
| Leaks | Relieves back pressure in the drain system that could force water onto your floor. |
It’s clear that a little bit of maintenance goes a long way.
Understanding how simple acts like cleaning a filter contribute to overall home upkeep can help you prevent costly plumbing repairs with regular maintenance. By keeping this pathway clear, you’re not just cleaning a part; you’re actively preserving the health of your entire appliance and avoiding many of the most frequent service calls. If you’re already facing issues, our guide to common washing machine issues and solutions can provide further insight.
Locating the Filter in Front Load vs Top Load Models
Finding your washing machine filter can sometimes feel like a scavenger hunt, especially if you’ve never done it before. But don’t worry, its location is actually quite predictable once you know what you’re looking for. The key difference lies in whether you have a front-load or a top-load machine, as the design of each dictates where manufacturers tuck this critical part away.
If you’re curious about how these designs affect more than just filter placement, our guide comparing top-load vs. front-load washer efficiency is a great read.
Front Load Washers: The Easy Find
If you own a front-load washer, you’re in luck. The filter location is almost always the same across all brands.
Look for a small, square or rectangular door on the bottom-right corner of the machine’s front panel. Occasionally, it might be on the bottom-left, but it’s always near the floor. Behind this little door, you’ll find a round cap that you can unscrew—that’s your filter assembly. Just be ready with some towels and a shallow pan, because a bit of leftover water will definitely spill out when you open it.
Top Load Washers: The Hunt for the Hidden Filter
Top-load washers are a completely different beast and where most of the confusion comes from. Unlike their front-load cousins, there’s no single, standard spot for the filter. In fact, some models don’t even have a filter you can clean yourself.
If your machine has one, here are the most common places you’ll find it:
- Inside the Agitator: For washers with a classic central agitator post, the filter is often a mesh screen tucked right inside. You can usually just pop the cap off the top of the agitator and pull it straight out.
- Around the Drum’s Rim: Some top-loaders have small, plastic-caged lint traps that simply clip onto the top edge of the inner drum. They’re designed to catch fuzz as water sloshes around.
- Within the Water Inlet: You might also find small filter screens where the water hoses connect to the back of the machine. These are more for catching sediment from your home’s water supply, not so much for lint from your clothes.
Pro Tip: Have you checked all these spots and still come up empty-handed? Your machine might have what’s called a “self-cleaning” pump. These systems are designed to grind up small bits of debris and flush them right down the drain, which means there’s no filter for you to clean.
This is exactly why so many top-load owners don’t even realize their machine might have a filter. If you’re not sure, your user manual is your best friend here. A quick search for your model number online will also give you a definitive answer and save you from a frustrating (and fruitless) search.
Step-by-Step Guide to Cleaning Your Washer Filter
Alright, you’ve found the filter—now for the satisfying part. This guide focuses on cleaning the drain pump filter, which is the most common type you’ll find in front-load machines and even some newer top-loaders. With a little prep, it’s a quick and easy job.
First, let’s make sure a small task doesn’t turn into a big mess. Taking a few moments to prepare will save you from mopping up your laundry room floor.
Step 1: Gather Your Supplies
Gather these simple items before you start to make the process smooth and clean.
| Item | Its Purpose |
|---|---|
| Old Towels | Have 2-3 thick ones ready. They’re your first line of defence against spills right in front of the access panel. |
| A Shallow Pan | A baking sheet with a lip or a small roasting pan works perfectly to catch the bulk of the water. |
| Flashlight | A small one (or your phone’s light) is key for inspecting the filter housing once the filter is out. |
| Soft Brush | An old toothbrush is perfect for scrubbing away grime and buildup without damaging the filter mesh. |
With these items on hand, you’re ready to get started without any last-minute scrambling.
Step 2: Unplug and Prepare for Water
Before you do anything else, unplug your washing machine. This is non-negotiable for safety. You don’t want the machine trying to start a cycle while your hands are in it.
Open the small access door that hides the filter. You should see a round cap (that’s the filter) and often a small, thin rubber hose tucked beside it, sealed with a plug. This little hose is your secret weapon for a clean job.
Step 3: Drain the Trapped Water
That little rubber tube is an emergency drain hose, and it’s there to save you from a flood. It lets you drain the water stuck in the pump before you twist off the main filter cap.
Place your shallow pan right under the hose. Gently unclip it and point the end into the pan. Now, carefully pull the plug out of the end of the hose—water will start to flow. It can be a slow trickle, but be patient and let it drain completely. Once the dripping stops, put the plug back in securely and clip the hose back into its spot.
Step 4: Remove and Rinse the Filter
Now for the main event. Even after draining, a little water will still be in the filter housing, so keep a towel right underneath the cap.
Firmly grip the filter cap and turn it counter-clockwise. It can be tight from the water pressure and buildup, so you might need to use a bit of muscle. As you unscrew it, pull it straight toward you.
Get ready for what you might find inside. It’s a treasure trove of forgotten items and gunk:
- Lint, pet hair, and tangled threads
- Coins, buttons, and bobby pins
- Soap scum and slimy detergent residue
Take the filter over to your sink and pull out all the debris. An old toothbrush and some warm running water are all you need to scrub it clean. There’s no need for harsh chemicals.
While you’re focused on the filter, remember that the rest of the machine needs attention too. For a full deep-clean, check out our complete guide on how to clean a washing machine—it covers everything from the drum to the door seal.
The image below shows you the most common filter locations for both front-load and top-load washers, helping you know exactly where to look on your machine.
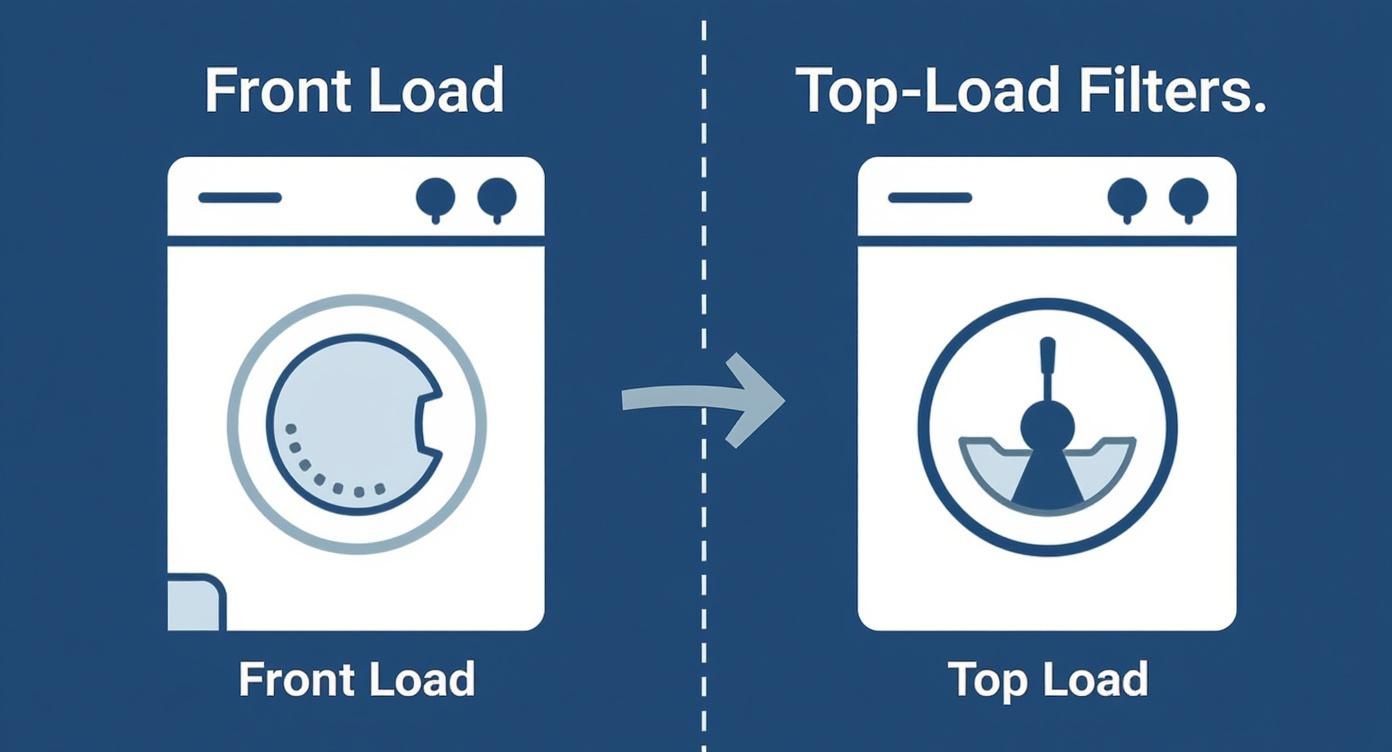
As you can see, front-load filters are almost always at the bottom front, while top-load filters can be in a few different, less obvious spots.
Step 5: Final Inspection and Reassembly
Don’t just screw the filter back in yet. Grab your flashlight and peek inside the housing where the filter goes. You’d be surprised what gets past the filter and stuck in the pump impeller, stray socks, coins, and other small items are common culprits. Carefully fish out anything you find.
Now, slide the clean filter back in. Make sure it lines up with any grooves or notches inside the housing. Turn it clockwise until it’s snug and secure, but be careful not to overtighten and crack the plastic.
Once it’s tight, close the access panel, plug the washer back in, and you’re good to go. You’ve just extended the life of your machine and improved its performance in about 15 minutes.
How Your Filter Protects More Than Just Your Washer
When you clean out all that gunk from your washing machine filter, you’re doing a lot more than just stopping clogs and funky smells. You’re actually doing a bit of critical environmental cleanup, right from your own laundry room.
Every time you wash clothes made from synthetic fabrics like polyester, acrylic, or nylon, thousands of tiny plastic threads—known as microfibers—break off and go down the drain.

These particles are so small they can easily slip right through most wastewater treatment plants. From there, they flow into our rivers, lakes, and oceans, becoming a huge source of plastic pollution. This harms aquatic life and can even make its way back into our own food and water.
Your washer’s filter acts as a crucial first line of defence. While its main job is to catch bigger things like lint, coins, and hair, it also traps a surprising amount of these microfibers before they ever enter the water system.
A Small Act with a Big Impact
The scale of this microfiber problem is staggering, and it’s prompting some serious action, especially in places that have studied the issue closely.
For instance, it’s estimated that up to 4.85 million pounds of microfibers enter California’s environment from laundry alone each year. This makes them the most common type of microplastic pollution found there.
In response, the state passed a groundbreaking law in 2023. Starting in 2029, all new washing machines sold must have built-in microfiber filters capable of capturing up to 90% of these fibres in every load. You can read more about California’s bill on OceanConservancy.org.
What you’re cleaning out of your filter isn’t just lint and lost coins. It’s a concentrated collection of plastic pollutants that you are single-handedly preventing from reaching our waterways.
This new law shows just how effective filtration can be. The routine task of cleaning your washing machine filter ensures it keeps working at its best—capturing not only pump-clogging debris but also these invisible environmental threats. Each time you clear it out, you’re not just performing maintenance. You’re making a direct, positive impact on the health of our planet.
Troubleshooting Common Filter Problems and Pro Tips
Even a seemingly simple job like cleaning a washing machine filter can throw you a curveball. Over the years, we’ve seen it all—from filters that feel like they’re welded shut to mysterious gunk that just won’t rinse away. This is where we get into the real-world frustrations you might face and give you some practical, pro-level advice to get it sorted.
One of the most common complaints we hear is a filter cap that absolutely refuses to budge. This is usually from a combo of water pressure and built-up grime creating a stubborn vacuum seal.
Before you even think about grabbing a wrench, try using a towel or a pair of rubber gloves to get a much better grip. If a bit of gentle force isn’t doing the trick, do not force it. You could easily crack the plastic housing. A little patience goes a long way here.
Common Issues and Pro Solutions
Here’s how to handle a few of the headaches you might run into:
- The Stuck Filter Cap: If a better grip isn’t enough, try gently tapping the edge of the cap with a screwdriver handle. Sometimes, that little bit of vibration is all it takes to break the seal.
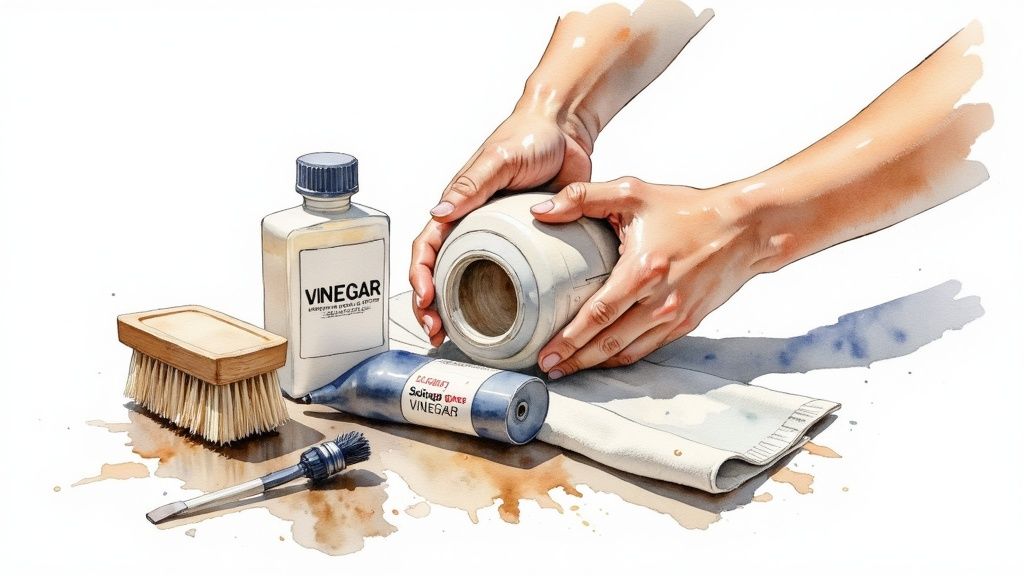
- Stubborn Grime and Odors: Is your filter coated in a slimy, smelly mess? A quick rinse isn’t going to fix that. Let the filter soak for about 30 minutes in a solution of equal parts warm water and white vinegar, then give it a good scrub with a soft brush.
- Brittle or Broken Plastic: If the filter cap or its housing feels brittle or you spot any cracks, stop what you’re doing. A broken filter assembly is a guarantee for a major leak and needs a replacement part.
Pro Tip: After cleaning, put a very thin layer of silicone grease on the filter’s rubber O-ring before you screw it back in. This tiny step prevents it from getting stuck next time and makes future cleanings a breeze.
These little troubleshooting tricks can make a world of difference. Of course, if you run into more serious issues—like your washing machine won’t drain or spin even after a thorough filter cleaning—it could point to a deeper problem with the drain pump itself.
While you’re at it, it’s always a good idea to check on your other home appliances for safety and efficiency. For instance, these expert dryer vent cleaning tips are a great reminder of how important regular upkeep is across the board.
Knowing When to Call for Appliance Repair
While cleaning the filter yourself can solve a surprising number of washer headaches, it’s just as important to know when to put the tools down and call a pro. Sometimes, forcing the issue can turn a minor hiccup into a major, expensive flood.
There are a few clear red flags that tell you the problem runs deeper than a simple clog.
When to Stop and Call a Technician
- The Filter Is Jammed Shut: If you’ve given the filter cap a firm but reasonable twist and it won’t budge, stop right there. Trying to muscle it open with more force or tools is a recipe for disaster. You can easily crack the entire pump housing, which is a far more serious and costly fix.
- You Can See Visible Damage: Take a close look at the filter and the plastic housing it screws into. See any cracks, even small hairline ones? That’s a guaranteed leak waiting to happen. This isn’t something you can patch up; the part needs to be replaced immediately to prevent water damage.
- The Problem Doesn’t Go Away: You’ve done everything right—you cleaned the filter thoroughly, removing all the gunk and lint. But your washer still won’t drain, the cycle won’t finish, or you’re still getting that dreaded error code. This usually means the blockage is further down the drain hose or there’s an issue with the drain pump itself.
These situations are beyond routine maintenance and require an expert touch. For complex issues like these, professional washer repair is your safest and most effective bet.
Frequently Asked Questions
Here are a few of the most common questions we get from homeowners about their washing machine filters. We’ll tackle how often to clean it, what happens if you don’t, and a few other symptoms a clogged filter can cause.
How often should I clean my washing machine filter?
For most households, a good rule of thumb is to clean it every 3-4 months. But that’s just a starting point—it’s definitely not a one-size-fits-all schedule.
Think about your laundry habits. If you have pets shedding fur all over the place, or you’re constantly washing heavily soiled work clothes, you might want to check it monthly. Staying on top of it is the best way to prevent slow draining and pump strain before they become real problems.
What happens if I never clean my washing machine filter?
Ignoring the filter is a surefire way to run into frustrating issues down the road. It usually starts small: you’ll notice your clothes are still sopping wet after a cycle because the machine can’t drain properly. Before long, you’ll start to notice a stubborn, musty smell that clings to both the machine and your “clean” laundry.
The real danger, though, is burning out the drain pump. When the motor has to constantly fight to push water through a solid blockage of lint and grime, it will eventually overheat and fail. That turns a simple cleaning job into a much more expensive repair call.
Can a clogged filter stop a washer from spinning?
Yes, absolutely. This is one of the most common signs of a blockage. Modern washing machines have sensors that know how much water is in the drum. If that water can’t drain out because the filter is clogged, the sensors won’t allow the high-speed spin cycle to start. It’s a smart safety feature to prevent a tub full of water from sloshing around and possibly flooding your laundry room. So, if your washer is washing but won’t spin, a blocked filter is the very first thing you should check.
Where is the filter on a top load washing machine with an agitator?
On many top-load models with a central agitator, the filter is often located right inside the agitator column itself. You can usually access it by popping off the top cap of the agitator and pulling out a mesh lint screen from inside. If it’s not there, check for clip-on filters along the top inner rim of the washer drum.
Need help with your washer?
Need appliance repair? Visit RepairMyAppliance.ca or call 587-416-5888 for fast, professional service.