Discovering a puddle of water spreading from your washing machine is a frustrating experience for any homeowner. Before panic sets in, it's crucial to know that your first actions should focus on safety and damage control, not immediate troubleshooting.
The very first step is to cut the power to the appliance at your circuit breaker. Next, turn off the hot and cold water supply valves, which are typically located on the wall directly behind the washer. This two-step process immediately stops the flow of electricity and water, preventing a dangerous situation and stopping the leak from worsening.
Your Emergency Action Plan for a Leaking Washer
Finding water on your laundry room floor requires a calm, methodical response. Panicking can lead to costly mistakes or, worse, safety hazards. Before you try to find the source of the leak, your primary goal is to secure the area and prevent a small problem from turning into a major disaster.
Here is a step-by-step plan to guide you. Following these steps in order will help protect you, your home, and your appliance.
Emergency Action Plan For a Leaking Washer
| Priority | Action Required | Why It's Important |
|---|---|---|
| 1: Safety | Kill power at the circuit breaker. | Prevents the risk of electric shock from water and electricity mixing. |
| 2: Stop the Source | Turn off the hot and cold water supply valves. | Stops more water from entering the machine and adding to the flood. |
| 3: Damage Control | Unplug the washer and clean up all standing water. | Minimizes water damage to floors, drywall, and subflooring. |
| 4: Document | Take photos/videos of the leak and any damage. | Creates a record for potential insurance claims before cleanup begins. |
| 5: Access | Gently pull the machine away from the wall. | Allows you to inspect hoses and gives the area behind the unit a chance to dry. |
Once you’ve completed these immediate steps, you can take a breath and begin to diagnose what's wrong with your machine.
Prioritize Safety Above All Else
I can't stress this enough: water and electricity are a lethal combination. Your first move must always be to eliminate the risk of electric shock. Go to your home's main electrical panel and flip the breaker that powers your laundry room. If the breakers aren't clearly labeled, shut off the main breaker for a few minutes to be safe.
With the power safely disconnected, you can approach the machine to stop the water flow.
- Find the Water Valves: Look behind your washer. You should see two faucet-like valves—one for hot water (often red) and one for cold (usually blue).
- Turn Them Off: Turn both valves clockwise until they are completely closed. This cuts off the water supply to the appliance.
Contain the Damage and Document Everything
Now that the immediate threats are handled, it’s time to shift into damage control mode. As an extra precaution, unplug the washing machine from the wall socket.
Grab towels, a mop, or a wet-dry vacuum to soak up the standing water. The faster you clean it up, the less chance it has to seep into your flooring, subfloor, and drywall. It's truly shocking how long it takes mold to grow after a water leak, so acting quickly is critical.
Key Takeaway: Before you clean up, pull out your phone. Taking clear photos or a quick video of the puddle, the machine's position, and any visible water damage is crucial for any potential insurance claims down the road.
Finally, carefully pull the machine away from the wall. This gives you better access for inspection and helps the area behind it air out—a vital step in preventing mold and mildew.
If you’ve done all this and still feel out of your depth, or if the problem seems like more than a simple loose hose, don't hesitate to stop. When in doubt, it’s always best to call in the pros. For immediate, expert help, you can always contact our expert technicians to handle the situation safely and efficiently.
Pinpointing The Exact Source Of The Leak
You've stopped the immediate flood, so the panic is over. Now, it's time to put on your detective hat. Finding where a washing machine leak is coming from is the most critical part of the repair process. If you misdiagnose the problem, you could waste time and money fixing a part that was perfectly fine.
Think of it like tracing a stream back to its source. The clues are all there—the type of water, when the leak appears, and where the puddle forms. Each one tells a piece of the story about what's gone wrong inside your machine.
This flowchart highlights the first things you must do the second you spot a puddle.

Seriously, don't even think about poking around until the power is off and the water is shut off. Safety first, always.
Start With The Obvious External Checks
Before you grab a screwdriver and start removing panels, let's check the easy stuff on the outside. You’d be surprised how many service calls are for simple external issues. Your first stop should be the back of the washer, where the hoses connect.
- Fill Hoses: You'll see two hoses—one for hot water, one for cold—running from your wall taps to the machine. Run a dry hand along the entire length of both. Check the connection points at the wall and where they screw into the washer. Look for drips, crusty mineral buildup (a dead giveaway of a slow leak), or any cracks and bulges in the rubber.
- Drain Hose: This is the larger hose that removes dirty water. Is it properly secured in the laundry sink or standpipe? Inspect it for cracks or splits, and double-check that the clamp holding it to the back of the washer is tight.
Pro Tip: One of the most common issues we see is a slightly loose connection at the wall valve. Often, a simple quarter-turn with pliers is all it takes to stop a nagging drip. Make sure to check both hot and cold lines.
Analyzing The Clues From The Leak Itself
The leak itself provides valuable information. Is the water clean or soapy? Does it only appear at a certain point in the wash cycle? Answering these questions will help you zero in on the culprit.
If the water is clean and clear, the leak is likely happening before it mixes with detergent. This points toward the fill hoses or the internal water inlet valve.
If the puddle is soapy or sudsy, the leak is happening during or after the main wash or rinse cycle. This suggests the problem lies with a part that handles dirty water, like the drain hose, drain pump, or even the main tub seal.
Before you can fix any leak, you have to be sure where it's starting. This general guide on how to detect a water leak offers diagnostic tips that are useful for more than just washing machines.
Common Leak Sources and Their Timings
Timing is everything. If you can, run a small, empty cycle and watch the machine closely to see exactly when the water appears.
| Leak Timing | Likely Culprit | What to Look For |
|---|---|---|
| During Fill Cycle | Fill Hoses / Inlet Valve | Water dripping from the back of the machine near where the hoses connect. |
| During Agitation/Wash | Tub Seal / Door Gasket | Puddles forming at the front (especially on front-loaders) or right under the centre of the unit (top-loaders). |
| During Drain/Spin Cycle | Drain Pump / Drain Hose | A sudden gush of soapy water from the bottom or back of the washer as it empties. |
For front-loaders, a leak from the door is almost always caused by the door boot seal—that big grey rubber gasket. Check it carefully for any small tears, holes, or trapped gunk like hair and fabric softener buildup that's preventing a tight seal.
We often find that appliance troubles travel in packs. If your washer is acting up, it might be a good time to give your other water-reliant appliances a once-over. Our guide on common dishwasher repair issues can help you spot problems before they start.
DIY Fixes for Common Washing Machine Leaks
A puddle on the floor doesn't always mean a major appliance meltdown. Many of the most common washing machine leaks are surprisingly simple to fix yourself. With a few basic tools and some patience, you can often solve the problem without booking a service call, getting your laundry routine back on track quickly.
But first, let's revisit that golden rule: always unplug the washing machine and turn off the water supply valves. Safety first, always.
With that crucial step done, let’s roll up our sleeves and look at a few frequent leaks you can likely fix on your own.
Tightening or Replacing Supply Hoses
This is the number one cause of leaks we see in the field, and thankfully, it's also the easiest to solve. If you've tracked the drip to the back of the machine where the hot and cold water lines connect, you’re almost certainly dealing with a loose connection or a worn-out hose.
Tools You'll Need:
- A pair of channel-lock pliers
- A dry rag or paper towels
- A small bucket (just in case)
Start by using a dry rag to wipe the hose connections at both the wall and the washer. A slow drip can be hard to spot on a wet surface. If you see water, place your bucket underneath and give the metal fitting a gentle tighten with your pliers—a quick quarter-turn is often enough.
If the leak persists, or if you spot any visible cracks, bulges, or rust on the hose itself, it’s time for a replacement. We always recommend upgrading from standard rubber hoses to braided stainless steel lines. They're far more durable and resistant to bursting, giving you excellent peace of mind for a few extra dollars.
Cleaning a Clogged Drain Pump Filter
If your front-load washer is leaking from the bottom, especially when it’s draining, a clogged drain pump filter is the prime suspect. This filter catches lint, coins, and other debris before it can damage the pump. When it gets plugged, water backs up and spills out.
Most front-loaders have a small access door on the bottom-front corner.
- Place a shallow pan and some old towels under the access door. You’ll be surprised how much water can come out!
- Open the door to find the round filter cap. Some models have a small rubber drain tube next to it—if yours does, uncap that first to drain most of the water into your pan.
- Slowly twist the filter cap counter-clockwise. Be ready for the rest of the water to spill out as you loosen it.
- Pull the filter all the way out. It will likely be full of lint, hair, buttons, and maybe that missing sock or a few coins.
- Rinse the gunk out of the filter under a tap, wipe out the filter housing inside the machine, and then screw the filter back in, ensuring it’s tight.
Expert Tip: Get into the habit of cleaning this filter every two to three months. It’s a five-minute job that prevents not only leaks but also poor drainage and musty odours, keeping your machine running smoothly.
Replacing a Damaged Door Gasket
If you own a front-load washer, a leak from the front door is almost always a problem with the door boot seal—that big rubber gasket. Over time, it can get torn, develop mold, or have something stuck in it that breaks the seal.
Tools You'll Need:
- A new door gasket made for your specific washer model
- Spring-expansion pliers (a huge help, though you can sometimes get by with flathead screwdrivers)
- A Phillips head screwdriver
- A little dish soap for lubrication
This repair is more involved, but it's manageable for a patient DIYer. The basic process involves removing the outer and inner spring clamps holding the old gasket, peeling it off, and then carefully stretching the new one into place.
A helpful trick is to apply a small amount of dish soap to the lip of the new gasket, which helps it slide into the groove on the drum. The toughest part is getting the spring clamps back on; this is where specialized pliers really save the day. You can find plenty of model-specific videos online that will walk you through the exact steps for your machine. When you're done, you'll have stopped that annoying front-door drip for good.
When You Should Call a Professional Technician
While there’s real satisfaction in fixing things yourself, some washing machine leaks are the machine's way of waving a white flag. These are the leaks that signal deeper, more complicated problems brewing inside.
Knowing when to put the tools down and pick up the phone is just as important as knowing how to tighten a hose. It’s the difference between a successful fix and accidentally turning a small problem into a very expensive one. Making the wrong move on an internal component can escalate a manageable leak into a catastrophic failure.
Recognizing The Signs of a Major Problem
Some leaks are dead giveaways that you're dealing with something beyond a simple fix. These issues are usually buried deep within the machine’s mechanics, where you'd need specialized tools and diagnostic experience to sort them out.
If you spot any of these symptoms, it’s a strong sign it's time to call in a pro.
- Leaks from the Centre of the Machine: A puddle forming directly under your top-load washer often points to a failed tub seal or a problem with the transmission. These are not quick jobs; they are labor-intensive repairs that require taking almost the entire machine apart.
- Loud Grinding or Squealing Noises: When a leak is accompanied by loud mechanical grinding or squealing during a spin cycle, it could mean the main bearings are shot. Water leaking past a failed seal often damages the bearings, creating a complex and costly repair.
- Visible Burns or an Electrical Smell: This is an immediate stop sign. Any sign of electrical trouble—a burning smell or scorch marks near the motor or control panel—combined with a leak is a serious hazard. Water and electricity are a dangerous mix, and you need an expert to handle it safely.
Key Insight: A small, persistent leak is often more damaging in the long run than a sudden gush. Slow drips can go unnoticed for weeks, seeping into your subfloor and drywall, leading to rot and mold. The cost to repair that kind of secondary damage can be astronomical.
Understanding The Risks of Complex DIY Repairs
Trying to tackle an advanced repair without the right training can be a costly gamble. The potential for causing more damage is high, and you could easily void any warranty on the appliance. Beyond the financial hit, there are real safety concerns.
One of the biggest reasons to call a professional is the sheer cost of potential water damage. According to recent data, a busted appliance can cause an average of $1,600 in damages per incident. And when you look at the bigger picture of household water damage claims, that average cost skyrockets. You can learn more about water damage insurance claims statistics to get a sense of the financial risk.
When Professional Expertise Is a Must
Ultimately, a professional technician brings more than just a toolbox to the job. They bring years of hands-on experience, model-specific knowledge, and access to the right replacement parts. This ensures the repair is done correctly, safely, and efficiently the first time.
You should seriously consider calling for help if:
- The leak's source is inside the machine and not easy to access.
- The fix requires disassembling the drum, motor, or transmission.
- You're not 100% confident in your diagnosis or your ability to perform the repair.
- You have a newer, high-efficiency model with complex electronics.
When you’re up against a serious issue, getting an expert diagnosis is the smartest play. For comprehensive and reliable help, our guide to professional washer repair offers more insight into how technicians tackle these tough problems. Making that call can save you time, money, and a massive headache.
Proactive Maintenance To Prevent Future Leaks
The best way to handle a washing machine leak is to prevent it from happening in the first place. Fixing a leak is always a reaction to a problem that’s already started, but a little proactive attention can save you the stress and expense of sudden water damage.
Think of it as a quick health check-up for your washer. These small, consistent habits tackle the most common failure points before they have a chance to become a major headache.
Inspect and Upgrade Your Hoses Regularly
Let’s be honest, the water supply hoses are the weakest link in your washing machine’s setup. Standard black rubber hoses become brittle and weak over time, creating a ticking time bomb for a burst pipe and a serious flood.
A simple visual inspection twice a year makes all the difference. Get a flashlight and look for:
- Bulges or Blisters: These are clear warning signs that the rubber is stretching and close to failing.
- Cracks and Brittleness: Check for tiny cracks, especially near the metal fittings where the hose flexes the most.
- Rust or Corrosion: Any sign of rust on the fittings means you've had a slow, long-term leak that needs immediate attention.
Pro Tip: Don't just inspect—upgrade. We always recommend swapping out standard rubber hoses for braided stainless steel lines. They are far more resistant to bursting and kinking, giving you peace of mind for a very small upfront cost.
Even the best hoses don’t last forever. As a smart preventative measure, plan to replace your washer’s supply hoses every three to five years, no matter how good they look.
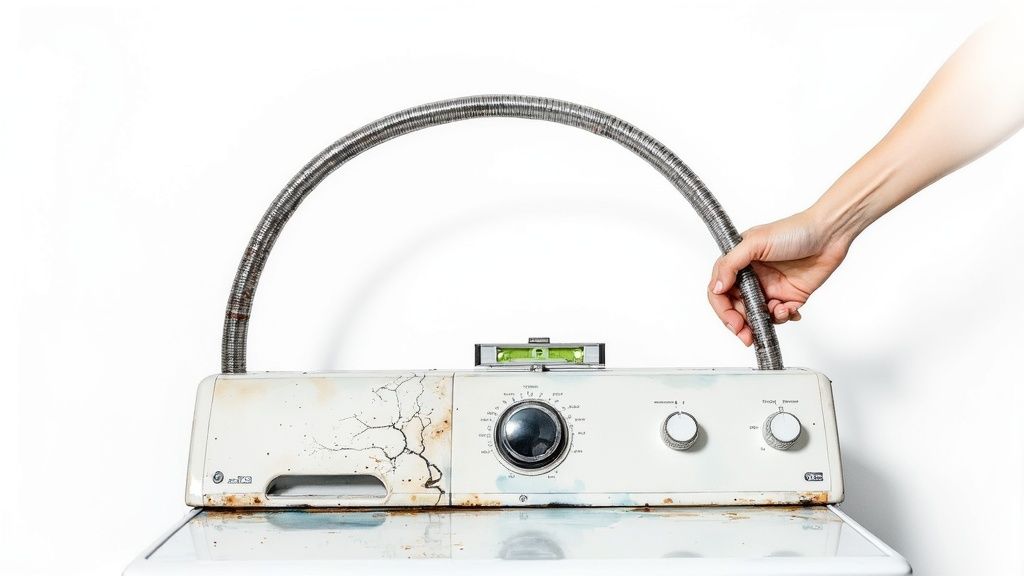
Ensure Your Machine Is Perfectly Level
An unbalanced washing machine doesn’t just make a racket during the spin cycle; it puts a huge amount of stress on the entire frame and all internal parts. Those constant, violent vibrations can loosen internal hose connections, wreck suspension components, and eventually lead to leaks.
Grab a spirit level and place it on top of your washer. Check it from front to back and then side to side. If it’s not perfectly level, adjust the machine’s feet until the bubble is right in the center. Most washers have threaded feet you can raise or lower with pliers or a wrench.
It's a five-minute job that ensures the tub spins smoothly, protecting everything from the bearings to the seals.
Clean the Drain Pump Filter
If you have a front-load washer, a clogged drain pump filter is one of the top culprits for leaks from the bottom of the machine. This trap is designed to catch lint, coins, buttons, and whatever else falls out of pockets before it can destroy the pump.
When it gets clogged, water can’t drain out properly. It has nowhere to go but back up and spill onto your floor. Cleaning it is a simple but critical task.
- Find the small access door, usually on the bottom-front of your washer.
- Put a shallow tray and a towel underneath to catch the water that will come out.
- Slowly unscrew the filter cap, letting the water drain out in a controlled way.
- Pull the filter out, clean out all the gunk, and give it a good rinse.
- Screw it back in securely.
Doing this every three months will prevent clogs, stop leaks, and even help get rid of musty laundry room smells.
Avoid Overloading the Machine
It’s tempting to stuff as much as you can into one load, but overloading is a fast track to problems. A load that’s too heavy forces the drum to bang around violently, stressing the tub seals and bearings. Over time, this abuse can cause the seals to fail, leading to a major leak from the center of the unit.
Always stick to the manufacturer’s guidelines for load size. A good rule of thumb is that you should be able to comfortably fit your hand between the top of your laundry and the inside of the drum. This gives clothes enough room to tumble freely, which means a cleaner wash and a much healthier machine. The cumulative impact of small leaks is significant; for example, a single dripping faucet can waste nearly 58 gallons weekly, showing how even minor washer drips contribute to water loss over time. You can discover more insights about household leak impacts on waternewsnetwork.com. For more maintenance tips, you can explore other helpful articles in our appliance repair blog.
Frequently Asked Questions About Washing Machine Leaks
Even after you've found the source of a leak, a few questions always seem to pop up. Getting clear on the details can help you prevent the same headache down the road. Here are some of the most common questions our technicians hear from homeowners.
Why is my washing machine leaking from the bottom?
When you see water pooling right under the machine, it's a classic sign pointing to a few usual suspects. Nine times out of ten, the culprit is a faulty drain pump. Over years of use, the plastic can crack, or the seals can simply give out. It could also be an internal hose that has wiggled loose, cracked from age, or been punctured. In a top-loader, this can sometimes signal a more serious issue like a failing main tub seal. The first move is always the same: unplug the machine and remove the front or back access panel to get a good look. Follow the trail of water to its highest point to find the source.
Can I still use my washing machine if it has a small leak?
We get this question a lot, and the answer is always a firm no. It is highly inadvisable to use a washing machine with any leak, no matter how tiny it seems. Water and electricity are a dangerous mix, and the risk of a serious shock just isn't worth it. Your safety has to come first. Besides the immediate danger, even a slow drip can cause silent, expensive damage. Water can seep into your subfloor, rot the wood, and create the perfect home for mold. It's always cheaper and safer to stop using the washer and get the leak fixed right away.
How often should I change my washer hoses?
As a simple rule of thumb for preventive maintenance, you should plan on replacing standard rubber fill hoses every three to five years. Rubber gets brittle with age and can develop weak spots or burst without warning, causing major floods. For real peace of mind, we always recommend upgrading to braided stainless steel hoses, which are far more durable. No matter which type you have, get in the habit of giving them a quick visual check a couple of times a year. For more information on parts and labor coverage, you can learn more about our comprehensive appliance repair warranty that backs all of our services.
Need appliance repair? Visit RepairMyAppliance.ca or call 587-416-5888 for fast, professional service.