It’s a frustrating moment: you open your washing machine, expecting clean clothes, only to find a tub full of murky, standing water. Before you panic, take a deep breath. A washing machine that won't drain is one of the most common appliance issues, and the fix is often simpler than you think.
This guide will walk you through the most likely culprits, from simple clogs you can clear in minutes to more complex issues, helping you get your laundry routine back on track.
Why Your Washing Machine Won’t Drain
When your washer holds onto water, it brings laundry day to a screeching halt. That stagnant water can start to smell and even lead to water damage if not addressed quickly. Understanding the root cause is the first step to a solution. The problem is often similar to a plumbing clog, so knowing how to clear a slow drain can be a good starting point.
This diagnostic flowchart will help you troubleshoot the issue logically, starting with the easiest fixes.
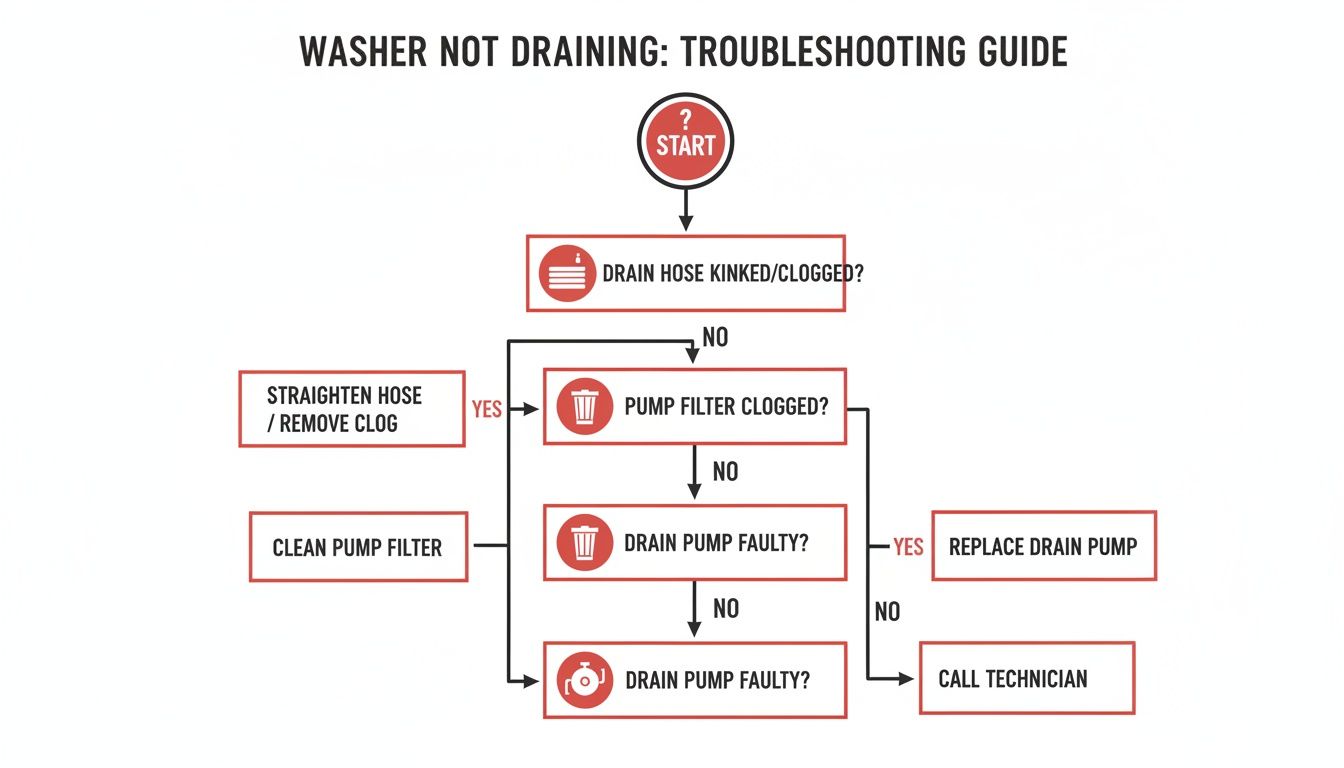
As you can see, the path is straightforward: check the drain hose, then the pump filter, and finally, inspect the drain pump itself.
Common Culprits Behind Drainage Failure
Here in Alberta, we see drainage failures all the time. In fact, it's one of the top reasons people call us for appliance repair. A staggering 38% of all our service requests are for washing machines that won't drain.
The problem usually boils down to one of these usual suspects:
- A Clogged or Kinked Drain Hose: This is the first thing to check and, thankfully, the most common cause. It's an easy fix.
- A Blocked Drain Pump Filter: This little filter is designed to catch lint, coins, and other debris, but it can get completely clogged over time.
- A Faulty Drain Pump: If the hose and filter are clear, the pump's motor might have given up.
These issues are so widespread that our family-owned team handled over 4,200 washing machine calls just last year. Of those, a massive 62% were directly related to drainage problems. You can learn more about similar headaches in our guide to common washing machine issues and solutions.
Safety First: Your Pre-Repair Checklist
Before diving into a repair, safety is paramount. You're dealing with an appliance that uses both water and electricity, so a few minutes of preparation can prevent serious injury or a flooded laundry room.
First, unplug the washing machine from the wall outlet. This is non-negotiable and ensures there is no risk of electric shock while you work.
Next, turn off the water supply. Locate the hot and cold water valves behind your washer and turn them clockwise until they are fully closed. This prevents any new water from entering the machine while you work.
Gather Your Essential Tools
Having the right tools ready will make the job much smoother. You don’t need a professional toolkit, just a few household items:
- A Bucket and Old Towels: Your machine is full of water, so be prepared for spills. Place towels around the washer's base and have a shallow bucket or pan ready to catch water.
- Pliers: A pair of slip-joint or channel-lock pliers is essential for removing spring clamps from the hoses.
- Screwdriver or Nut Driver: Most washer access panels are secured with Phillips-head or quarter-inch hex-head screws. Having both types on hand is a good idea.
- Flashlight or Headlamp: The inside of a washing machine is dark. A good light source is crucial for inspecting hoses and components for clogs.
With the power off, water shut off, and your tools gathered, you are ready for a safe repair. For a deeper dive into appliance electrical safety, our article on why appliances need fuses and their different types is a great resource.
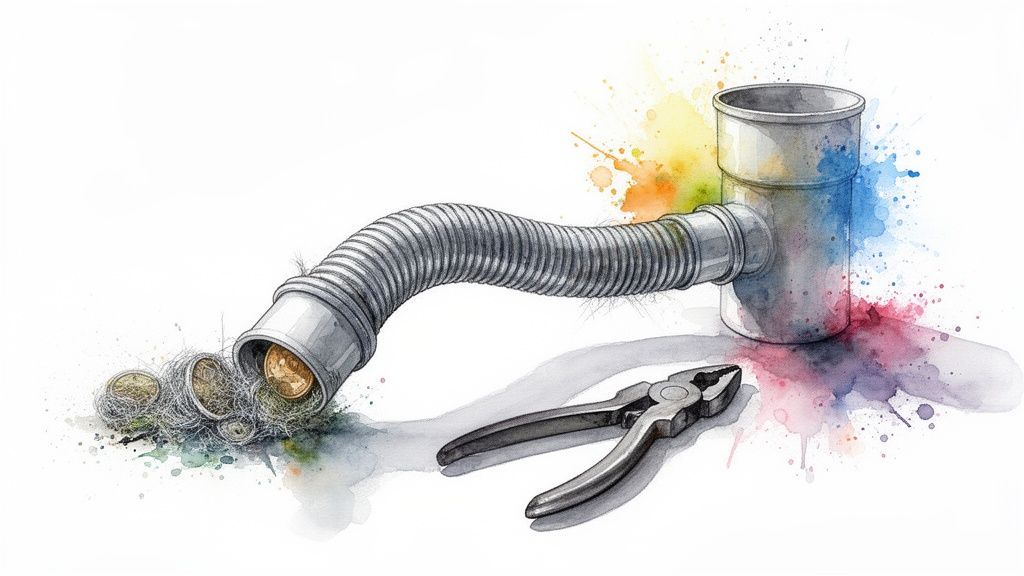
Step 1: Check the Drain Hose for Kinks and Clogs
When your washing machine refuses to drain, the real culprit is often the drain hose. Before suspecting a major mechanical failure, always start with this simple and incredibly common point of failure.
This flexible tube is responsible for carrying dirty water out of your machine. If it gets kinked, crushed, or clogged, the water has nowhere to go. This is the first thing any professional technician checks, and it should be your first step too.
Safely Accessing and Inspecting the Hose
To inspect the hose, carefully pull your washing machine away from the wall. Go slowly to avoid straining any connections. Once you have enough space, use a flashlight to examine the entire length of the hose.
You're looking for two main problems:
- Kinks and Bends: Is the hose sharply bent or flattened against the wall? A severe kink acts like a closed valve, stopping water flow.
- Proper Placement: Ensure the hose isn't pushed too far down into the standpipe (the drain pipe in the wall). This can create a siphon effect that prevents proper drainage. The hose should form a gentle, arching curve.
If you find a kink, simply straightening it may solve the problem. Run a "Drain & Spin" cycle to confirm before pushing the machine back.
Expert Tip: When you slide the washer back, leave about 10-15 centimetres of space between it and the wall. This little gap is your best defence against the hose getting accidentally kinked or squashed again.
How to Disconnect and Clear a Clogged Hose
If the hose isn't kinked, the next step is to check for an internal blockage. Have your bucket and towels ready, as there will be water in the hose.
First, remove the hose from the standpipe and let any trapped water drain into your bucket. Next, use pliers to squeeze the spring clamp holding the hose to the back of the washer. Wiggle the hose off and drain the remaining water.
With the hose detached, check for clogs. The easiest way is to take it outside and flush it with a garden hose. If water flows freely, it's clear. If it backs up, you've found the issue. For stubborn clogs, a straightened wire hanger or a small plumber's snake can help dislodge the gunk. You’d be surprised what we find—from baby socks and lint to coins and keys.
Data from our service calls in Alberta shows clogged drain hoses are behind 29% of all "washing machine won't drain" emergencies.
Troubleshooting Common Drain Hose Problems
| Symptom | Potential Cause | DIY Solution |
|---|---|---|
| Water pooling behind the washer | A kink in the hose or a loose connection. | Pull the machine out, straighten the hose, and check that clamps are tight. |
| Gurgling sounds from the drain | The hose is pushed too far into the standpipe, causing a siphon effect. | Reposition the hose so it forms a gentle arch and isn't inserted too deeply. |
| Slow draining, but not fully stopped | A partial clog from lint, hair, or small debris. | Disconnect and flush the hose with high pressure from a garden hose. |
| Washer stops mid-cycle with an error | The machine's pressure switch detects water isn't draining due to a full blockage. | Remove the hose completely and manually dislodge the clog with a plumber's snake. |
This table can help you quickly identify the problem before you need to disconnect anything.
Reconnecting Everything Correctly
Once the hose is clear, reattach it securely to the washer's pump outlet with the clamp. Guide the other end back into the standpipe, ensuring it has a smooth, gradual bend. Proper placement is crucial for good drainage—a point we always emphasize during our washer and dryer installation in Edmonton.
After reconnecting, run a test cycle to ensure the problem is solved before pushing the machine back into place.
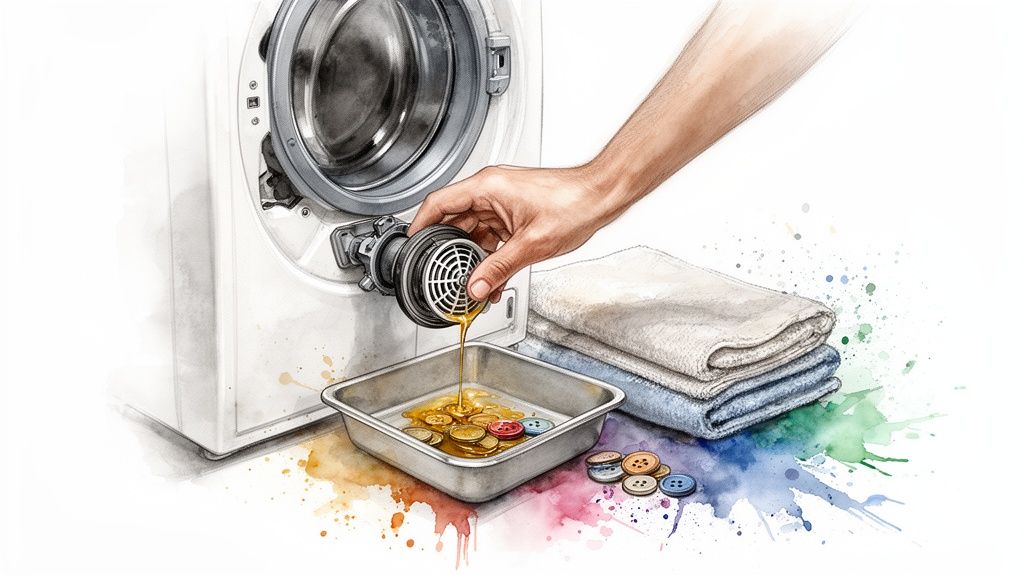
Step 2: Clean The Hidden Drain Pump Filter
If the drain hose is clear but the washer still won't drain, the next likely culprit is the drain pump filter. Many homeowners don't even know this part exists, but it’s a common source of drainage issues.
The filter's job is to protect the drain pump by catching lint, hair, coins, and other debris before they can damage the motor. Over time, this gunk can build up and completely block water flow. The good news is that cleaning it is a simple fix you can do yourself.
Locating And Preparing To Open The Filter
On most front-load washers and many newer top-loaders, the filter is located behind a small access panel at the bottom front of the machine, usually on the right side. You may need a flathead screwdriver to gently pry the panel open.
Warning: There will be a lot of trapped water. Prepare for it to prevent a mess.
- Place several thick towels in front of the access panel.
- Get a shallow pan or baking dish and slide it under the filter cap to catch the water.
This preparation is crucial. Some machines have a small emergency drain tube next to the filter; if yours does, you can use it to drain the water into a bowl in a more controlled way.
Pro Tip: Gently tilt your washing machine backward and prop the front feet up on a small block of wood. This uses gravity to your advantage, keeping more water toward the back of the tub and reducing the initial gush when you pop the filter open.
Removing And Cleaning The Filter
Once you’re ready, turn the filter cap counter-clockwise to unscrew it. It might be tight due to grime and water pressure. As you loosen it, water will start to flow out. Go slowly, letting your pan fill up, then dump it and repeat until the water stops.
Once the water is out, fully unscrew the cap and pull the filter out. You'll likely find a mix of:
- Lint and pet hair
- Coins, buttons, and other small items
- Soggy bits of tissue
- Bobby pins or screws
Take the filter to a sink and clean it thoroughly. Remove large debris by hand, then use an old toothbrush and soapy water to scrub the mesh screen. For a detailed guide, see our post on how to clean a washing machine filter.
Final Inspection And Reassembly
Before reinserting the filter, use a flashlight to inspect the housing. Look for any debris left behind. You should see the pump's impeller (a small propeller); give it a flick with your finger to ensure it spins freely. If it’s stuck, you’ve found a larger issue.
Screw the clean filter back in clockwise until it is tight to prevent leaks. Close the access door and run a "Rinse & Spin" cycle to confirm the problem is fixed.
Step 3: Diagnose a Faulty Drain Pump
You’ve cleared the drain hose and cleaned the filter, but the washer is still full of water. At this point, all signs point to the drain pump itself—the motor that actively pushes water out of the machine.
When the drain pump fails, the entire drainage system stops working. A few key checks can help you confirm if the pump is the problem before you order a new part.
Listen for Telltale Sounds of Failure
Your ears are one of your best diagnostic tools. The sounds a washing machine makes (or doesn't make) can reveal a lot about the pump's health.
Start a "Drain & Spin" cycle and listen closely near the bottom of the machine.
- A Loud Humming or Grinding Noise: This usually means the pump motor is receiving power but something is jamming it, like a hard object that got past the filter.
- Complete Silence: If you hear nothing but a faint click from the control board, the pump is likely not getting power or the motor has burned out.
- A Faint Clicking or Whirring: This could indicate that the impeller's plastic blades are broken. The motor spins, but the damaged blades can't move the water.
A humming sound suggests a physical blockage, while silence points to an electrical failure or a dead motor that needs replacement.
Get Hands-On with a Visual Impeller Check
If you heard a humming or grinding sound, it's time for a hands-on inspection. Remember to unplug the washer first.
The drain pump is typically located near the filter housing. You may need to disconnect the hoses attached to it to get a clear view. Keep your bucket and towels ready for more water.
Look inside the pump's inlet port where the filter was. You should see the impeller, which looks like a small plastic fan. Try to turn it with your finger or a long screwdriver.
A healthy impeller should spin freely, perhaps with slight magnetic resistance. If it's stuck or feels gritty, it's jammed. If it spins with no resistance at all, it might have broken off the motor shaft.
Carefully remove any hair, string, or debris tangled around the impeller blades with needle-nose pliers.
The Definitive Multimeter Test
For those comfortable with basic electrical tests, a multimeter can confirm a failed pump. With the washer unplugged, disconnect the pump's electrical connector. Set your multimeter to the resistance setting (Ohms, Ω symbol) and touch the probes to the two metal terminals on the pump motor.
A healthy pump motor should have a reading between 10 and 20 ohms.
- An "OL" (open loop) or infinite reading means the internal circuit is broken—the pump is dead.
- A reading of zero indicates a short circuit.
In either case, the pump must be replaced.
Defective drain pumps account for 24% of washer drainage issues we see in Alberta. For more information, discover more insights about why washer drain pumps fail and how to identify the signs. By methodically checking for sounds, jams, and electrical continuity, you can confidently diagnose a faulty drain pump.
Knowing When To Call An Appliance Pro
There's satisfaction in a successful DIY repair, but it's equally important to know your limits. If you've checked the hose, cleaned the filter, and inspected the pump, but your washer still won't drain, it’s time to call a professional. Pushing forward can turn a simple fix into a costly mistake.
Loud mechanical grinding or a distinct burning smell are urgent red flags. These indicate a failing motor or a serious electrical issue that is unsafe to handle without proper training.
Beyond Simple Blockages
Sometimes, a drainage problem mimics a simple clog but is caused by a more complex failure. Diagnosing these without professional tools is a frustrating guessing game.
- Faulty Lid Switch: On top-loaders, a broken lid switch can prevent the machine from draining and spinning, even if the drain path is clear.
- Malfunctioning Control Board: If the washer's "brain" fails, it can't send the signal for the pump to start draining.
- Failed Pressure Sensor: This sensor tells the control board when the tub is empty. If it malfunctions, the washer may think it's still full and refuse to spin.
Attempting to diagnose these electrical components without the right equipment is dangerous. A professional technician can pinpoint the exact cause, saving you from buying unnecessary parts. Learn more about our process for expert washer repair services.
DIY vs Professional Repair Decision Guide
Use this table to decide whether to continue with a DIY fix or call a professional.
| Problem Indicator | Recommended Action | Reasoning |
|---|---|---|
| Simple Clog Suspected (e.g., slow draining) | DIY (Check filter & drain hose) | These are common issues that are often resolved with basic tools and minimal effort. |
| Loud Grinding or Scraping Noises | Call a Professional | This often points to a failing pump motor or worn bearings, requiring specialized tools. |
| Burning Smell or Smoke | Call a Professional Immediately (and unplug) | This indicates a severe electrical problem or a seized motor and is a significant fire hazard. |
| No Power to the Machine (breaker is fine) | Call a Professional | Could be a failed control board, faulty wiring, or an internal fuse. Electrical diagnosis is for trained technicians. |
| All DIY Checks Done, Still Won't Drain | Call a Professional | The problem is likely a complex component like a sensor, lid switch, or control board. |
| Error Code on Digital Display | DIY (Initial Check) then Professional | Look up the error code in your user manual. If the suggested steps fail, a pro is needed. |
Calling a professional is a smart move that prioritizes safety and ensures the job is done correctly. Our technicians are equipped to diagnose and fix any washer problem, giving you peace of mind and getting your laundry routine back on schedule.
Frequently Asked Questions About Washer Drainage Issues
It’s normal to have questions, even after trying a few fixes. Here are answers to the most common queries we receive from Alberta homeowners.
Why Does My Washing Machine Not Drain But Still Spins?
If your washer spins but leaves water behind, the problem is almost certainly in the drainage system. The spin cycle can't effectively remove water if it has nowhere to go. This symptom usually points to one of three culprits: a clogged drain pump filter, a blockage in the drain hose, or a failing drain pump that lacks the power to push all the water out. The good news is that a spinning drum means your main motor and belt are likely fine.
How Much Does A Washer Drain Repair Cost In Alberta?
The cost to fix a washer drainage issue in Alberta varies depending on the problem.
- DIY Fix: Clearing a simple clog yourself will only cost you time.
- Service Call & Clog Removal: A professional service call to diagnose and clear a blockage typically costs $150 to $250.
- Drain Pump Replacement: If the pump motor needs to be replaced, the cost is usually between $250 and $450, including the part and labour.
For a precise quote, it's best to schedule a diagnostic visit.
Can I Still Use My Washer If It Is Not Draining?
No. Using a washer that won't drain is a bad idea. Trapped water can damage the motor and electrical components, creating a safety hazard. It also significantly increases the risk of an overflow, which can lead to expensive water damage to your home. Stagnant water will also lead to mould and mildew, creating a foul odour. Always resolve the drainage issue completely before doing another load of laundry.
In rare cases, a washer drainage issue can be a sign of a larger plumbing problem. If you suspect a sewer line clog, it's wise to check if your homeowners insurance cover sewer backup.
How Can I Prevent My Washing Machine From Clogging Again?
A few simple habits can dramatically reduce the risk of future clogs.
- Check pockets before washing clothes to remove coins, keys, tissues, and other items.
- Use mesh laundry bags for small items like baby socks or delicates to prevent them from entering the drain system.
- Clean the drain pump filter every 3-4 months. This 15-minute task is the single best way to ensure your washer continues to drain properly.
Need appliance repair? Visit RepairMyAppliance.ca or call 587-416-5888 for fast, professional service.